
Snacks
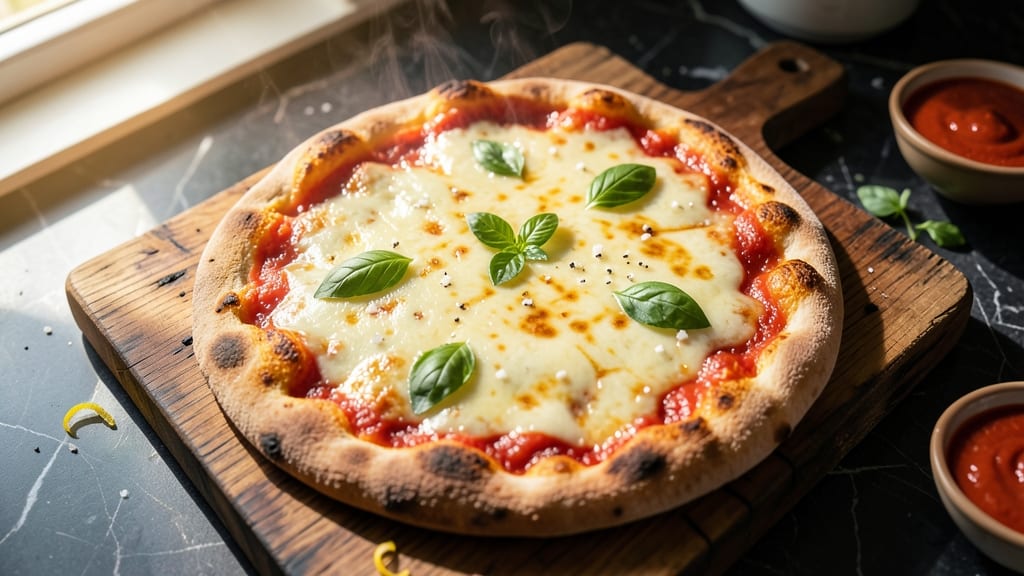
This basic cheese pizza recipe delivers the perfect balance of crispy crust and gooey, stretchy cheese that makes every bite satisfying. The secret lies in a simple dough technique that creates that ideal airy texture while maintaining structure—no fancy equipment required.
I've tested this recipe countless times, and it consistently produces a pizza that rivals takeout, but with the satisfaction of homemade.
The foundation starts with a straightforward dough made from basic pantry staples that rises just enough to create that signature pizza texture. After shaping and stretching, we'll apply a thin layer of sauce that serves as the perfect canvas for melted cheese.
The key to achieving that crispy crust is pre-baking the dough before adding toppings, which prevents a soggy bottom while allowing the cheese to melt perfectly.
What you'll end up with is a pizza that's crispy around the edges, tender in the middle, and topped with a blanket of melted cheese that pulls into perfect, stretchy strands. The aroma alone as it comes out of the oven will have everyone gathering around the table.
This recipe is designed to be your go-to weeknight dinner that feels like a special occasion.
Whether you're feeding a family or treating yourself to a solo pizza night, this method delivers consistent results. The beauty of this recipe is its simplicity—minimal ingredients, straightforward steps, and a technique that works every time. Let's get started on creating your perfect slice.
Ingredients for basic cheese pizza
Pantry staples that transform into crispy crust and stretchy cheese perfection.
| Ingredient | Amount | Notes |
|---|---|---|
| All-Purpose Flour 🌾 | 3 ½ cups | Spooning into measuring cup (not scooping) |
| Active Dry Yeast 🍞 | ¼ tsp | Fresh yeast at half the amount |
| Granulated Sugar 🍚 | 1 tsp | Helps yeast activate faster |
| Warm Water 💧 | 1 cup | 110°F for optimal yeast activation |
| Olive Oil 🫒 | 1 tbsp | Extra-virgin for best flavor |
| Salt 🧂 | 1 tsp | Kosher or sea salt preferred |
| Pizza Sauce 🍅 | 1 cup | Store-bought or homemade marinara |
| Shredded Mozzarella Cheese 🧀 | 1 ½ cups | Low-moisture for perfect melt |
| Fresh Basil Leaves 🌿 | ¼ cup | Chopped for fresh aroma |
| Garlic Cloves 🧄 | 2 cloves | Minced for sauce flavor |
| Cornmeal 🌽 | 2 tbsp | For dusting pizza peel |
| Semolina Flour 🌾 | 1 tbsp | Optional for extra crispiness |
The flour is everything here—King Arthur or Gold Medal make the best dough, but any all-purpose works. I always grab mine at Whole Foods or the bulk section at Kroger—the finer the grind, the better the texture. For the yeast, Saf-Instant is my go-to because it doesn't need proofing in warm water, but if you're using active dry, make sure it's fresh (it expires!). The olive oil adds richness, so don't skimp—California Olive Ranch is my favorite for its fruity notes. And that sugar? It's not just for sweetness—it helps the yeast wake up faster, so don't skip it.
No pizza sauce on hand? Crushed tomatoes with garlic, salt, and a pinch of sugar work perfectly. Fresh basil is ideal, but dried oregano at half the amount gets you close in a pinch. For the cheese, low-moisture mozzarella is non-negotiable—it melts like a dream. If you can't find it, shred your own from a block (the pre-shredded kind has anti-caking agents that make it rubbery). The garlic? Freshly minced is best, but if you're lazy, one teaspoon of garlic powder works in a bind. Cornmeal isn't just for dusting—it adds that signature crunch to the crust.
This dough keeps for 24 hours in the fridge wrapped in plastic, or you can freeze it for up to 3 months by wrapping it tightly. The sauce and cheese can be prepped ahead too—just store them separately. For that extra-crispy crust, preheat your oven to 500°F with a pizza stone or inverted baking sheet for at least 30 minutes. And trust me, the first time you pull that golden, stretchy pizza from the oven, you'll be hooked—every time.
Why You'll Love This Recipe
- Pantry-Only Starter: The yeast mix comes from flour, sugar, and warm water—no fancy starters or waiting hours. I’ll be real: I’ve made this dough while scrolling through my phone, and it still rises like magic.
- Golden Crust Promise: That first bite? Crispy edges with a soft, airy center—all from a simple flour and olive oil combo. Not the prettiest, but the taste makes up for it every time.
- Leftover Hero: Slice it, freeze it, reheat it—this pizza stays fresh for days. Honestly, I’ve pulled a cold slice straight from the fridge at 3 PM and called it a meal. Works just as well.
- Budget Magic: Four ingredients cover the dough, and you’re using what you already have. Between us, this is how I feed my family for under $10. Reliable, no excuses.
Step-by-step instructions for crispy crust cheese pizza
Here's how to transform simple ingredients into a golden, crispy pizza with that perfect stretchy dough.
Activate the Yeast for Perfect Rise
In a small bowl, combine the 1 cup warm water (about 110°F), 1 tsp granulated sugar, and ¼ tsp active dry yeast. Let it sit for 5-10 minutes until frothy—this means your yeast is alive and ready to work. If it doesn't bubble, your yeast might be dead, and you'll need to start over.
While waiting, mix the 3.5 cups all-purpose flour and 1 tsp salt in a large bowl. Once the yeast mixture is bubbly, add the 1 tbsp olive oil and pour in the yeast mixture. Stir with a wooden spoon until a shaggy dough forms. This is where the magic begins—your dough will transform from sticky to smooth.
Knead Until Silky and Elastic
Turn the dough onto a lightly floured surface and knead for 8-10 minutes until smooth and elastic. You'll know it's ready when it springs back slowly when poked. If it feels sticky, add a little more flour, but don't overdo it—too much flour makes the crust tough.
Real talk: kneading is the secret to that crispy-yet-chewy crust. I like to use my knuckles for pressure—it's more effective than just pressing with my palms. Once kneaded, place the dough in a lightly oiled bowl, cover with a damp towel, and let it rise in a warm place for 1-2 hours or until doubled in size.
Shape and Pre-Bake the Crust
Punch down the risen dough and divide it into two equal balls (for a 12-inch pizza). Roll one ball into a circle on a floured surface, but don't press too hard—you want a thin crust with some thickness at the edges. Transfer the dough to a pizza peel dusted with 2 tbsp cornmeal and 1 tbsp semolina flour to prevent sticking.
Preheat your oven to 475°F and place a pizza stone or baking sheet inside. Once hot, slide the dough onto the stone and bake for 5-7 minutes until the edges are golden and puffed. This pre-bake gives you that crispy foundation—don't skip it! If the dough puffs too much, gently press it down with your fingers.
Assemble and Bake to Perfection
Spread 1 cup pizza sauce evenly over the pre-baked crust, leaving a ½-inch border for the crust. Sprinkle 1.5 cups shredded mozzarella cheese evenly over the sauce, then scatter ¼ cup chopped fresh basil leaves and 2 cloves minced garlic on top. The garlic adds a subtle depth that elevates everything.
Bake for 8-10 minutes until the cheese is bubbly and golden brown. Watch closely—you want that perfect balance of melted cheese and crispy crust. The moment the cheese starts to brown, it's ready. Remove from the oven and let it rest for 2 minutes before slicing—this keeps it from falling apart.
Serve with Confidence
Slice into 4 equal pieces and serve immediately while the crust is still crispy. The edges should be golden and slightly puffed, while the center remains soft and stretchy. If you made extra dough, store it in the fridge for up to 3 days—it makes great personal pizzas later!
Here's the thing—this pizza is all about that crispy crust. The secret lies in the pre-bake and the right amount of flour in the dough. Once you master this, you'll never buy takeout pizza again. Enjoy every bite of your homemade masterpiece!
Pro Tips For Making Basic Cheese Pizza
- Dissolve Yeast First: Mix the active dry yeast with warm water first—before adding sugar. I learned this the hard way when my dough took forever to rise because the yeast and sugar weren’t properly activated together. Just splash in the sugar last, let it fizz for 5 minutes, then add flour. That’s when the magic starts.
- Stretch, Don’t Roll: Skip the rolling pin—it crushes the air bubbles and makes the crust dense. Instead, dimple the dough with your fingers, then gently stretch it from the center outward (yes, it’ll tear; that’s normal). Pressing it into the pan too hard kills the rise. A little chaos now means a lighter crust later.
- Preheat Pan, Not Just Oven: Place your pizza pan or baking sheet in the oven while it’s preheating—no waiting. Cold pans steal heat, and your cheese will sweat instead of melt properly. If you’re using a stone, blast it for 15 minutes at max temp. Trust me, your cheese will thank you.
- Olive Oil Matters: Don’t skimp on the olive oil—use the good stuff, not whatever’s in the bottle. Drizzle after stretching the dough, letting it soak in for 5 minutes before adding sauce. A light coat prevents sogginess and gives that authentic, slightly crispy edge. (I used to use vegetable oil—big mistake.)
Troubleshooting this dish
Dough Too Sticky?
If your dough feels like glue, don't panic—this happens when the gluten develops too much or you've added too much water. First, try adding 1 tablespoon of flour at a time while kneading until it becomes manageable.
I've found that using King Arthur flour absorbs moisture better than store brands. For extra insurance, wet your hands slightly before handling the dough to prevent sticking to your fingers. 💪
Crust Not Crispy Enough
The secret to a crispy crust lies in the pre-bake step. Make sure your oven is preheated to 475°F for at least 30 minutes with a pizza stone or baking sheet inside.
If your crust still feels soft after baking, try brushing it with 1 tablespoon of olive oil before adding toppings—this adds a nice crunch. Also, avoid overloading the crust with sauce and cheese, which can make it soggy.
Cheese Not Melting Properly
Pre-shredded cheese often contains anti-caking agents that prevent proper melting. Instead, buy a block of low-moisture mozzarella and shred it yourself using the large holes on your box grater. For extra melt, sprinkle a pinch of cornstarch over the cheese before baking.
Another trick I use is to bake the pizza on the middle rack instead of the bottom—this ensures even heat distribution.
Sauce Pooling at Bottom
Too much sauce can cause a soggy crust, but even a thin layer can pool if not spread evenly. Use a 1 cup pizza sauce and spread it thinly, leaving a ½-inch border for the crust.
If you're using a thicker sauce, spread it first, then let it sit for 5 minutes before adding cheese—this gives it time to absorb slightly. I like to use a spatula or spoon to spread mine for even coverage.
Pizza Sticking to Peel
Cornmeal is your best friend here, but sometimes it's not enough. Dust your pizza peel generously with 2 tablespoons of cornmeal and 1 tablespoon of semolina flour before transferring the dough.
For extra insurance, I like to use a pizza peel with holes—it's easier to slide the pizza onto the stone without sticking. If it still sticks, gently lift the peel and slide the pizza onto the stone with a quick motion.
Dough Not Rising Properly
If your dough isn't rising, check the yeast first—it might be expired. Make sure your water is 110°F (not too hot or cold) and that your yeast is fresh. Place your dough in a warm spot, like the top of your fridge or near the oven with the light on.
If it still doesn't rise, try adding ½ teaspoon more sugar to help activate the yeast. Patience is key—some doughs take up to 2 hours to rise fully. ✨
Nutrition facts
Frequently asked questions
Can I make this pizza without a pizza stone?
Use a baking sheet or inverted pizza pan instead. Preheat it in the oven for 30 minutes before baking to mimic the stone's effect. For extra crispiness, place the sheet on the lowest oven rack. If you don't have any of these, a cast-iron skillet works too—just preheat it well and slide the pizza in carefully.
How do I know when the dough is fully risen?
Your dough is ready when it's doubled in size and has soft, puffy spots. Gently press two fingers into the dough—if it springs back slowly (not immediately), it's perfect. Pro tip: Place a warm towel over the bowl to help maintain warmth and speed up rising. If your kitchen is cold, try placing the dough near the oven with the light on.
What if I don't have fresh basil?
No problem! Use ¼ teaspoon dried basil or ¼ teaspoon dried oregano as a substitute. For extra flavor, add a pinch of red pepper flakes or a sprinkle of grated Parmesan on top of the cheese. The key is balancing the flavors—don't overdo it, or the pizza will taste too strong.
Can I make this pizza ahead of time?
Yes, but with a few tweaks. Prepare the dough and sauce up to 24 hours ahead, then refrigerate. Let the dough sit at room temperature for 30 minutes before shaping. For the sauce, store it in the fridge and reheat gently before using. Assemble the pizza just before baking—this keeps the crust crispy and cheese gooey. If you must prep fully ahead, bake the pizza, cool it completely, then reheat in a 350°F oven for 5-10 minutes.
Why does my crust get soggy?
Soggy crust usually happens from too much sauce or cheese or not pre-baking the dough. Use only 1 cup pizza sauce and spread it thinly, leaving a ½-inch border for the crust. Always pre-bake the dough for 5-7 minutes before adding toppings. If your oven runs hot, try baking on the middle rack instead of the bottom for even heat distribution.