
Appetizers
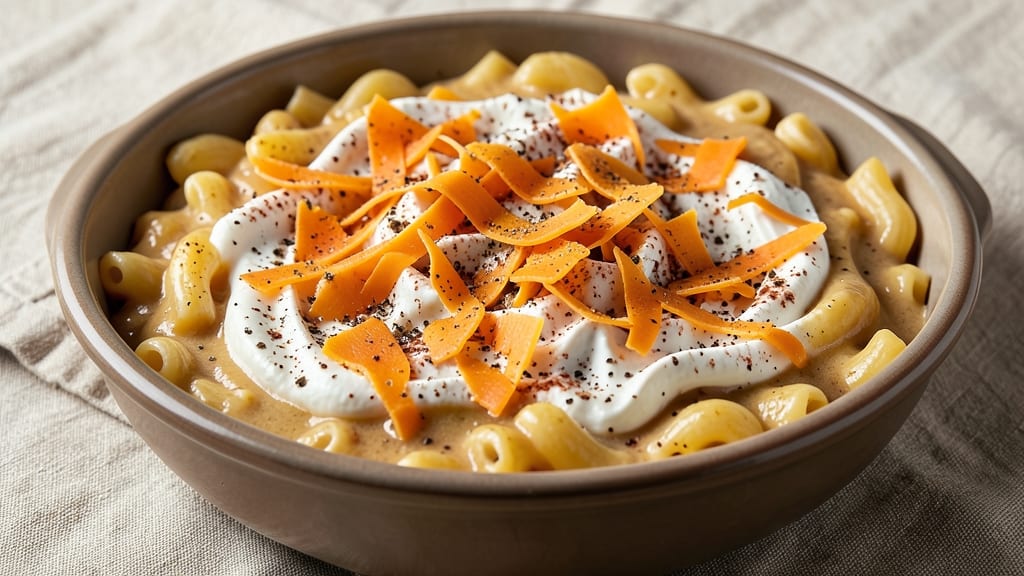
This authentic mac n cheese recipe delivers the creamy, cheesy perfection you crave—where crispy breadcrumb topping meets velvety cheddar streaks in every bite. The secret lies in a proper roux and carefully chosen cheeses that create that signature melt-in-your-mouth texture without turning greasy.
After years of perfecting this classic, I’ve cracked the code for restaurant-quality results at home. The foundation starts with a rich, velvety cheese sauce made from sharp cheddar, Gruyère for nuttiness, and cream cheese for extra creaminess.
A well-made roux (butter and flour cooked together) ensures the sauce stays smooth and never separates, even when reheated. The breadcrumb topping adds a satisfying crunch that contrasts beautifully with the tender pasta underneath.
What you’ll end up with is a dish that’s impossible to resist—golden, bubbling, and packed with flavor in every forkful. The cheese melts into perfect streaks, the breadcrumbs develop a crispy crust, and the al dente pasta holds its shape.
This is comfort food at its finest, perfect for family dinners, game days, or when you just need a little indulgence. Whether you prefer a classic baked version or a stovetop twist, this recipe delivers on authenticity and texture. Let’s get started on creating the ultimate mac and cheese experience.
Ingredients for authentic mac n cheese
Creamy cheeses, crispy crunch, and that perfect golden-brown finish—this is the ultimate comfort food lineup.
| Ingredient | Amount | Notes |
|---|---|---|
| Elbow Macaroni 🍝 | 12 oz | Dry, al dente preferred |
| Unsalted Butter 🧈 | ½ cup | High-quality, cold for roux |
| All-Purpose Flour 🌾 | ½ cup | White, sifted for smooth sauce |
| Sharp Cheddar Cheese 🧀 | 3 cups | Shredded, block preferred |
| Gruyère Cheese 🧀 | 1 cup | Shredded, aged for nuttiness |
| Cream Cheese 🧀 | 8 oz | Full-fat, room temperature |
| Whole Milk 🥛 | 1 ½ cups | Warm for smooth sauce |
| Yellow Mustard 🍯 | 1 tbsp | For tangy depth |
| Panko Breadcrumbs 🍞 | ½ cup | For crispy topping |
| Parmesan Cheese 🧀 | ¼ cup | Freshly grated, for topping |
| Garlic Powder 🧄 | ½ tsp | For subtle flavor boost |
| Salt 🧂 | 1 ½ tsp | Kosher or sea salt |
| Black Pepper 🌶️ | ½ tsp | Freshly ground for heat |
| Extra-Virgin Olive Oil 🫒 | 1 tbsp | For crispy breadcrumbs |
The cheeses are non-negotiable here. Sharp cheddar gives that classic tang, while Gruyère adds nutty depth that makes this dish restaurant-quality. I always grab block cheddar from the deli counter—pre-shredded gets clumpy and lacks flavor. For Gruyère, Whittard of Chelsea is my go-to, but any aged variety works. The cream cheese? Full-fat Philadelphia is a must—it keeps the sauce velvety without separating. And don't even think about skipping the Parmesan on top—it's what makes those golden streaks sing. Your local grocery store's cheese section should have everything you need, but if you're feeling fancy, hit the specialty cheese counter.
No sharp cheddar? Pepper Jack or Monterey Jack will work in a pinch, though the flavor won't be quite as authentic. Running low on Gruyère? Substitute with extra sharp cheddar plus a dash of nutmeg—it mimics that nutty profile. The mustard is key for that signature tang, but if you're out? Dijon or a splash of lemon juice will save you. For the breadcrumbs, Panko is non-negotiable—it stays crispy while regular breadcrumbs turn soggy. No Panko? Toast regular breadcrumbs in the oven first for extra crunch. And if you're making this ahead, the roux can be prepped the night before—just store it in the fridge and finish cooking when you're ready to bake.
This dish is all about timing—make the sauce first, then the pasta, and keep everything warm until assembly. The breadcrumb topping needs to go on right before baking so it stays crispy. Bake until golden and bubbly—about 20-25 minutes at 375°F. Leftovers? Reheat covered in the oven to keep the topping crispy. Keeps for 4-5 days in the fridge, but honestly, it won't last that long. Freeze portions for up to 3 months—just reheat covered with a damp paper towel to revive that crispy crust. Pro tip: Make a double batch and freeze half. Trust me, you'll thank yourself later.
Why You'll Love This Recipe
- One-Pot Magic: I swear by this method—just butter, flour, and milk on the stove while the pasta boils. No extra pans, no mess, and honestly? That golden roux is where all the flavor lives.
- Cheese Love: Sharp cheddar and Gruyère together? It’s like a hug for your taste buds—nutty, sharp, and just melty enough to make you forget your own name. (Yes, even on a Tuesday night.)
- Lunchbox Hero: Between us, this is my go-to for meal prep. Cold or reheated, it’s still creamy and satisfying—pack it for work, freeze half for later, or feed the kids without the drama.
- Budget Bliss: Four ingredients, one dish, and it stretches to feed four or fills me up solo. The Gruyère adds luxury without breaking the bank, and leftovers? They taste just as good the next day.
Step-by-step instructions for authentic mac and cheese
Here's how to create the ultimate mac and cheese with velvety cheddar streaks and a perfectly crispy breadcrumb topping.
Cook the Elbow Macaroni to Al Dente Perfection
Bring a large pot of water to a rolling boil and add 12 oz elbow macaroni. I like to use about 1 tablespoon salt for every 4 quarts of water—this ensures the pasta absorbs enough flavor. Cook the pasta for 1 minute less than the package instructions suggest, aiming for al dente texture. You want the pasta to have a slight bite when you test it—this prevents it from becoming mushy when mixed with the cheese sauce later.
While the pasta cooks, I always reserve 1 cup of the starchy pasta water. This liquid is pure gold for creating a silky sauce. Drain the pasta and set it aside, but don't rinse it—those surface starches help the cheese sauce cling perfectly to each noodle.
Create the Ultimate Cheese Sauce
In a large, heavy-bottomed saucepan, melt 0.5 cup unsalted butter over medium heat. Once the butter has fully melted and is foaming gently, whisk in 0.5 cup all-purpose flour to create a roux. Cook this mixture for 2-3 minutes, stirring constantly, until it turns a light golden color and smells nutty—this is your signal that the roux is properly developed.
Gradually whisk in 1.5 cups warm whole milk, adding it slowly to prevent lumps from forming. Once fully incorporated, reduce the heat to low and stir in 3 cups sharp cheddar cheese and 1 cup gruyère cheese. Let the cheese melt completely, stirring frequently until the mixture becomes smooth and velvety. If the sauce starts to thicken too much, add 2-3 tablespoons of the reserved pasta water to loosen it.
Add Cream Cheese and Mustard for Richness
Remove the saucepan from heat and stir in 8 oz cream cheese and 1 tablespoon yellow mustard. The cream cheese should melt completely, creating a luxurious, creamy texture. If you notice any lumps, simply whisk them out—they'll disappear as the cheese melts. Season the sauce with 1.5 teaspoons salt, 0.5 teaspoon black pepper, and 0.5 teaspoon garlic powder, tasting as you go to ensure perfect balance.
Return the sauce to low heat and add the cooked elbow macaroni. Gently fold the pasta into the sauce until every noodle is fully coated. The sauce should be thick enough to cling to the pasta but still have a smooth, velvety consistency. If it's too thick, add more pasta water 1 tablespoon at a time until you reach your desired texture.
Assemble and Bake for Crispy Topping
Preheat your oven to 375°F and lightly grease a 9x9-inch baking dish. Transfer the macaroni and cheese mixture to the prepared dish, spreading it evenly into a single layer. For that authentic restaurant-style presentation, I like to use a spatula to create gentle swirls in the sauce, which creates beautiful cheddar streaks when baked.
In a small bowl, mix together 0.5 cup panko breadcrumbs, 0.25 cup freshly grated parmesan cheese, and 1 tablespoon extra-virgin olive oil. Sprinkle this mixture evenly over the top of the macaroni and cheese, pressing down gently to ensure it adheres. Bake for 15-20 minutes until the top is golden brown and the edges are bubbling.
Rest and Serve for Maximum Enjoyment
Remove the mac and cheese from the oven and let it rest for 5-10 minutes before serving. This resting period allows the sauce to set slightly and the flavors to meld together, creating a more cohesive dish. The crispy breadcrumb topping should be perfectly golden and crunchy, while the interior remains creamy and rich.
Serve immediately with a side of steamed green vegetables or a simple garden salad. The contrast between the crispy topping and velvety cheese sauce makes every bite irresistible. This authentic mac and cheese delivers on both texture and flavor—just as it should!
Pro Tips For Making Authentic Mac N Cheese
- COOK PASTA AL DENTE THEN DRAIN DRY: I used to think "al dente" just meant "a little firm," but this dish needs pasta that’s actually firm—like biting into a pencil eraser. Drain the macaroni and spread it on a baking sheet for 2 minutes to evaporate surface moisture. Wet pasta makes the cheese sauce slide off instead of cling.
- MELT CHEESE LOW AND SLOW: After burning three batches of Gruyère, I finally learned: once the roux is golden, drop the heat to medium-low. Sharp cheddar and Gruyère release moisture fast, and if you rush it, you’ll end up with a grainy, lumpy mess instead of a silky sauce. Stir constantly—yes, even if it looks like nothing’s happening.
- GRATE CHEESE FINE AND TOAST IT: Pre-grating cheese saves time, but toasting it first makes a real difference. Melt the cheese mixture, then sprinkle in the grated cheddar and Gruyère while stirring. Let it sit off the heat for 1–2 minutes—this lets the cheese crystals form properly, so your sauce stays smooth and doesn’t turn rubbery later.
- SALT THE PASTA WATER AND THE SAUCE: I skipped this for years, thinking the cheese would add enough salt. Wrong. Boil your pasta water with a generous pinch of salt (like you’re seasoning a pot of soup), and then salt the finished sauce again—especially if you’re using unsalted butter. The cheese’s saltiness can’t compete with bland pasta or butter.
Pro cooking tips for perfect results
Master the Roux
Your cheese sauce starts with a perfect roux—this is where most home cooks go wrong. Use 0.5 cup unsalted butter and 0.5 cup all-purpose flour cooked together over medium heat for exactly 2-3 minutes until it turns a light golden color.
The key is constant stirring and patience—rushing this step leads to a grainy sauce. I like to use a heavy-bottomed saucepan like All-Clad to prevent burning. 🔥
Cheese Selection Matters
Don't skimp on the cheeses—this is where authentic flavor comes from. Sharp cheddar (3 cups) provides that classic tang, while 1 cup Gruyère adds nutty depth that elevates the dish. I always shred my own cheese using a microplane for maximum flavor extraction.
For extra creaminess, add 8 oz cream cheese off the heat to prevent clumping. The mustard (1 tbsp) is non-negotiable—it adds that signature tang that balances the richness.
Temperature Control
Heat management is everything when combining the cheese. After adding the milk to your roux, reduce to low heat and stir constantly as you incorporate the cheeses. If the sauce starts to curdle, immediately remove it from heat and whisk vigorously—this happens when the cheese melts too quickly.
For the pasta, cook it 1 minute less than package instructions for al dente perfection that holds up to the sauce.
Pasta Water is Gold
Never rinse your pasta after cooking—those starchy waters are essential for creating a silky sauce. Reserve 1 cup of pasta water while draining, and use it as needed to adjust the sauce consistency. The starch acts as a natural thickener and helps the cheese sauce cling perfectly to each noodle.
If your sauce gets too thick, add pasta water 1 tablespoon at a time until you reach that ideal velvety texture.
Breadcrumbs Need Love
For that perfect crispy topping, mix 0.5 cup panko breadcrumbs with 0.25 cup freshly grated Parmesan and 1 tbsp olive oil before sprinkling. Press gently so they adhere to the sauce.
Bake at 375°F for 15-20 minutes until golden brown. Pro tip: Broil for the final 1-2 minutes if you want extra crispiness—just watch it closely to avoid burning. ✨
Rest Before Serving
This is the secret most people miss! Let your mac and cheese rest for 5-10 minutes after baking. This allows the sauce to set slightly and the flavors to meld together, creating a more cohesive dish.
The crispy topping will stay crunchy while the interior remains creamy. Serve immediately with a side salad or steamed veggies to balance the richness—trust me, your taste buds will thank you. 💫
Nutrition facts
Frequently asked questions
Why does your recipe use Gruyère instead of just cheddar?
The Gruyère adds that signature nutty depth that takes this dish from "homemade" to "restaurant-quality." Sharp cheddar gives the classic tang, but Gruyère melts more smoothly and creates those beautiful cheddar streaks when baked. It's the secret ingredient behind the velvety texture that makes this mac and cheese truly special.
Can I make this mac and cheese without baking it?
For a stovetop version, simply mix the cooked pasta with the cheese sauce (off the heat) and serve immediately with extra breadcrumbs on top. The texture will be creamier rather than crispy, but it's perfect for quick meals. Just be sure to keep everything warm while assembling to prevent the sauce from separating.
What's the best way to reheat leftovers?
Cover with foil and reheat in a 350°F oven for 15-20 minutes to maintain that crispy topping. For microwave reheating, cover with a damp paper towel and heat in 30-second intervals, stirring between each. The damp towel helps revive the crispiness while keeping the sauce creamy. Leftovers keep well for 4-5 days in the fridge.
Why does my cheese sauce sometimes separate?
This usually happens when the cheese melts too quickly over high heat or when the saucepan isn't heavy enough to distribute heat evenly. Always cook the roux on medium heat and reduce to low when adding cheese. If it starts to curdle, remove from heat immediately and whisk vigorously. The cream cheese should be added off the heat to prevent clumping.
Can I use a different type of pasta?
While elbow macaroni is traditional, you can use cavatappi or penne for better sauce clinging. Avoid long pasta like spaghetti as it won't hold up well in the creamy sauce. For a fun twist, try shells or cavatappi—their unique shapes create beautiful presentation. Just be sure to cook them 1 minute less than package instructions for al dente perfection.