
Main Courses
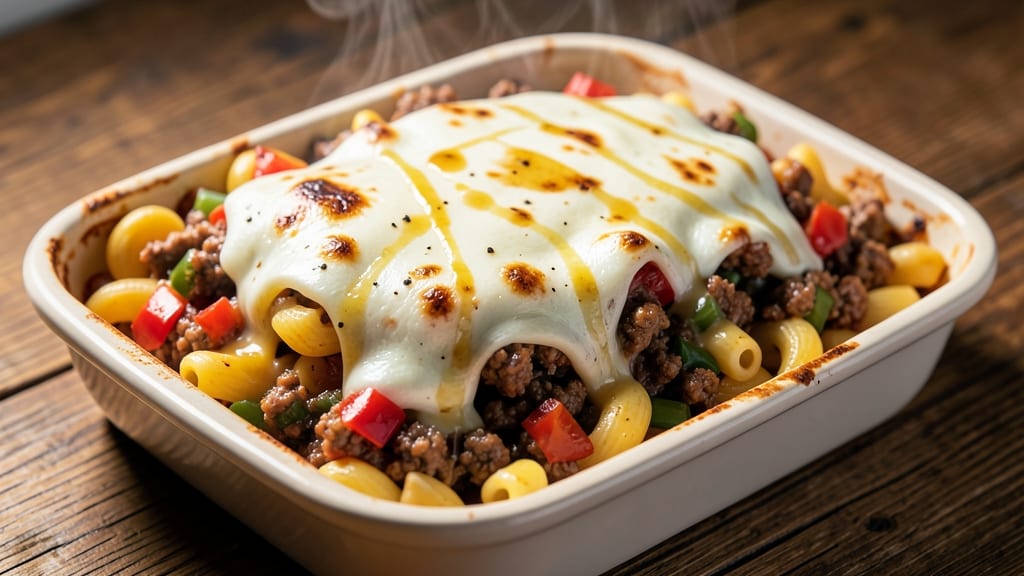
This baked macaroni and cheese recipe with ground beef transforms a childhood classic into a hearty, protein-packed dinner that satisfies every craving. 🔥 The rich, cheesy layers get a savory upgrade from perfectly seasoned ground beef, creating a dish that's equal parts nostalgic and sophisticated.
I developed this recipe during a particularly chilly Portland winter when I needed something comforting yet substantial enough to feed my growing appetite—and it became an instant family favorite.
The beauty of this recipe lies in its simplicity: tender elbow macaroni baked until bubbly, melted cheddar and mozzarella forming a creamy blanket, and ground beef adding depth with its savory, slightly smoky flavor.
What makes it special is the balance—creamy cheese meets hearty beef without overpowering the classic mac and cheese experience. The dish comes together in one baking dish, making cleanup a breeze while delivering restaurant-quality results.
By the time it emerges from the oven, you'll have golden-brown edges, a perfectly set cheese sauce, and a filling that's rich yet not overly heavy. The ground beef adds a satisfying texture contrast, while the cheese pulls everything together into one indulgent bite.
It's the kind of dish that transforms an ordinary weeknight into a special occasion without requiring extra effort.
Serve with a simple side salad or steamed green beans to balance the richness, or enjoy it as-is with warm crusty bread for soaking up every last drop of cheesy goodness.
This recipe is perfect for feeding a crowd, meal prepping for the week, or simply treating yourself to a comforting classic with a modern twist.
Ingredients for baked macaroni and cheese recipe with ground beef
Pantry staples meet savory comfort—this upgrade keeps the classic creamy magic while adding hearty beef goodness.
| Ingredient | Amount | Notes |
|---|---|---|
| Elbow Macaroni 🍝 | 12 oz | Uncooked, medium or elbow shape |
| Ground Beef 🥩 | 1 lb | 80/20 fat ratio preferred |
| Sharp Cheddar Cheese 🧀 | 2 cups | Shredded, block preferred |
| Mozzarella Cheese 🧀 | 1 cup | Shredded, low-moisture preferred |
| Whole Milk 🥛 | 1 ½ cups | Full-fat for creaminess |
| Unsalted Butter 🧈 | 4 tbsp | Cold, cubed for melting |
| All-Purpose Flour 🌾 | 2 tbsp | For thickening sauce |
| Yellow Onion 🧅 | 1 whole | Diced, medium size |
| Garlic Cloves 🧄 | 3 cloves | Minced, fresh preferred |
| Dried Mustard 🌶️ | 1 tsp | For depth of flavor |
| Salt 🧂 | 1 ½ tsp | Kosher or sea salt |
| Black Pepper 🌶️ | ½ tsp | Freshly ground preferred |
| Paprika 🌶️ | ½ tsp | Smoked for extra flavor |
The ground beef is where the magic happens. 80/20 fat ratio gives you that rich, juicy texture—leaner cuts can dry out. I grab mine from Costco for the best price, but any grocery store's pre-packaged chuck works. Brown it well before mixing—crispy edges add so much flavor. For the cheese, block cheddar shreds better than pre-shredded (no clumps!). Mozzarella? Low-moisture melts smoother, but fresh mozzarella works if you're feeling fancy. The onion and garlic? Sauté them in the same pan after the beef—it builds layers of flavor that jarred seasonings can't match.
No sharp cheddar? Colby Jack or Monterey Jack work in a pinch, though they won't be as tangy. Short on mozzarella? Extra cheddar plus a splash of milk mimics the stretch. The flour is non-negotiable for that silky sauce—all-purpose works, but if you've got roux flour, use that instead. For the milk, whole milk is key—skim makes the sauce separate. No smoked paprika? Regular paprika plus a pinch of liquid smoke gets you close. And if you're feeling adventurous, swap half the beef for Italian sausage—game changer for a weeknight dinner.
This reheats like a dream—5 minutes at 350°F gets it back to perfect. Keeps 4-5 days in the fridge, freezes for 3 months if you portion it right. I always make a double batch—leftovers taste even better as the flavors meld. Store the baking dish directly in the fridge for easy reheating, or transfer to airtight containers. The sauce thickens as it cools, so add a splash of milk when reheating if it looks too stiff. Trust me, no one will guess it's a weeknight meal—it'll feel like you slaved away in the kitchen.
Why You'll Love This Recipe
- Here’s what sold me: this dish reheats like a dream. Pack it into containers for work lunches or school lunches, and it’ll still taste fresh hours later. (Yes, even on a Tuesday night when you’re running late.)
- One-Pan Magic: I swear by this recipe because it’s literally dump-and-bake. Brown the beef in the same pan you’ll bake it in, toss in the cooked macaroni, cheese, and milk, then cover it with breadcrumbs if you’re feeling fancy. No extra pots, no extra mess—just pure convenience.
- Cheddar-Mozz Melt: That sharp cheddar and melty mozzarella combo? It’s the only way. The cheddar brings the tangy bite, while the mozzarella stretches into gooey, pull-apart perfection—plus, the ground beef adds a savory depth that makes every bite ridiculously satisfying.
- Lunchbox Hero: Here’s what sold me: this dish reheats like a dream. Pack it into containers for work lunches or school lunches, and it’ll still taste fresh hours later. (Yes, even on a Tuesday night when you’re running late.)
Step-by-step instructions for baked macaroni and cheese with ground beef
Here's how to make this hearty, cheesy twist on a classic—rich, savory, and perfect for feeding a crowd.
🍳 Step 1: Cook the Ground Beef and Sauté the Aromatics
Heat a large skillet over medium-high heat and add the 1 lb ground beef. Break it apart with a wooden spoon and cook until it's no longer pink, about 5-6 minutes. Drain any excess fat, leaving about 1 tablespoon in the pan for flavor.
In the same skillet, add the 1 whole yellow onion and 3 cloves garlic cloves (minced). Cook for 3-4 minutes until the onion is translucent and the garlic is fragrant. Stir in the 0.5 tsp paprika and 1 tsp dried mustard, cooking for another 30 seconds to toast the spices. This step builds the savory foundation for your dish.
🍳 Step 2: Make the Creamy Cheese Sauce
In a separate pot, melt the 4 tbsp unsalted butter over medium heat. Whisk in the 2 tbsp all-purpose flour and cook for 1 minute to remove the raw flour taste. Slowly pour in the 1.5 cups whole milk while whisking constantly to prevent lumps.
Bring the mixture to a gentle simmer and cook for 3-4 minutes until it thickens slightly. Reduce heat to low and stir in the 2 cups sharp cheddar cheese and 1 cup mozzarella cheese until completely melted and smooth. Season with 1.5 tsp salt and 0.5 tsp black pepper. Here's where the magic happens—the cheese should be fully incorporated and glossy.
🍲 Step 3: Combine Pasta and Sauce
Cook the 12 oz elbow macaroni in a large pot of boiling salted water until al dente (about 1 minute less than package instructions). Drain thoroughly and return to the pot. Pour the cheese sauce and beef mixture over the pasta, tossing gently to coat every noodle. The pasta should be fully enveloped in that creamy, cheesy goodness—no dry spots allowed.
Transfer the entire mixture to a greased 9x13-inch baking dish. Use a spatula to spread it evenly, creating a smooth surface. This step ensures even baking and that perfect golden crust on top.
🔥 Step 4: Bake to Bubble Perfection
Preheat your oven to 375°F. Bake the macaroni and cheese for 20-25 minutes until the top is golden brown and bubbly. If the top starts to brown too quickly, tent it loosely with aluminum foil to prevent burning while it finishes cooking underneath.
For that extra crispy top, broil for 1-2 minutes at the end, watching closely to avoid burning. The cheese should be melted throughout with a slightly crispy crust on top. Let it rest for 5 minutes before serving—this helps the layers set and makes slicing easier.
Pro Tips For Making Baked Macaroni And Cheese Recipe With Ground Beef
- Cook Beef Until Dry: I learned this the hard way—draining grease after browning ground beef leaves your mac and cheese tasting flat. Cook the beef until it’s actually crispy in spots and the fat has rendered out, then blot it dry with a paper towel. That extra step makes the sauce richer and the texture better.
- Shred Cheese Like It’s 1995: Skip the food processor for sharp cheddar—it turns into glue. Use a box grater or pulse in short bursts, then finish by hand for jagged edges that melt properly. Mozzarella? Tear it into chunks instead of shredding; it melts smoother and stretches better.
- Salt the Pasta Water Hard: This isn’t the prettiest method, but it’s the tastiest. Boil your elbow macaroni in water with way more salt than you’d use for plain pasta—think 1.5 tablespoons per pound. The starch in the water will thicken your sauce later, and the flavor will be deeper.
- Bake Covered, Then Uncovered: Start your mac and cheese under foil at 375°F (190°C) for the first 20 minutes—this ensures the cheese melts evenly and the edges don’t dry out. Then remove the foil and crank the heat to 425°F (220°C) for the last 5-10 minutes to get that golden, bubbly crust. (Yes, even if you’re impatient like me.)
Regional styles of this baked macaroni and cheese recipe with ground beef
Southern Comfort Style
In the South, this dish becomes a true crowd-pleaser with a few signature touches. I like adding ½ cup cooked corn and ½ cup diced bell peppers to the beef mixture for sweetness and texture.
Top with crushed Ritz crackers mixed with 2 tbsp melted butter before baking—this creates that iconic Southern crunch. Serve with a side of collard greens or buttery cornbread for the full experience. 🥣
Texas BBQ Twist
Texans take mac and cheese to new heights by adding ½ cup cooked ground beef with smoked paprika and cumin (swap ½ tsp smoked paprika for ½ tsp cumin and ½ tsp chili powder).
Stir in ¼ cup BBQ sauce (like Starkist BBQ) with the cheese sauce for a tangy kick. Top with crumbled bacon and green onions before baking. This version pairs perfectly with grilled sausages or jalapeño cornbread. 🌶️
Pacific Northwest Fusion
Here in Portland, I love giving this dish a local twist by adding ½ cup sautéed mushrooms and 2 tbsp cream cheese to the sauce for extra richness. Swap half the cheddar for Gouda cheese (shredded) for a nutty depth.
Top with toasted hazelnuts and fresh thyme before baking—this adds a touch of elegance that still feels comforting. Serve with a side of roasted Brussels sprouts or a simple arugula salad. 🌿
Italian-Inspired Version
For an Italian-inspired take, cook the ground beef with ½ tsp Italian seasoning and ½ tsp red pepper flakes. Replace half the mozzarella with Parmesan cheese (shredded) and stir in ¼ cup heavy cream with the milk for extra decadence.
Top with garlic breadcrumbs and basil leaves before baking. This version pairs beautifully with a glass of Chianti or a crisp white wine. 🍷
Kid-Friendly Upgrade
To make this dish even more appealing to kids, stir in ½ cup finely chopped hot dogs (cooked separately) with the beef. Add ¼ cup diced ham to the sauce for extra protein. Top with crushed potato chips (like Lay's) for a fun, crunchy texture.
Serve with steamed carrot sticks or apple slices for a balanced meal. This version is a hit at my house—Lily always asks for seconds! 🍎
Nutrition facts
Frequently asked questions
Can I use ground turkey or chicken instead of beef?
Ground turkey or chicken works beautifully—just be mindful of moisture. Use 85/15 turkey for juiciness, and drain excess fat after cooking. For chicken, add 1 extra tablespoon of flour to the sauce to compensate for its lower fat content. Season with an extra pinch of salt since poultry tends to be milder.
How do I prevent the top from getting too brown before the center is cooked?
Tent the baking dish loosely with aluminum foil after 15 minutes of baking. This traps heat while preventing over-browning. For extra insurance, reduce oven temp to 350°F for the final 5-10 minutes if needed. The cheese should be bubbly throughout before removing from oven.
Can I make this ahead of time for meal prep?
This reheats like a dream! Assemble the dish up to 24 hours ahead and refrigerate uncovered. Bake as directed (add 5-10 extra minutes if cold). For freezing, bake fully, cool completely, then store in airtight containers for up to 3 months. Reheat covered at 350°F for 20-25 minutes or until bubbly.
What's the best way to make it extra crispy on top?
For maximum crunch, mix ½ cup panko breadcrumbs with 2 tbsp melted butter and sprinkle on top before baking. Broil for 2-3 minutes at the very end—watch closely! Alternatively, use crushed tortilla chips or Ritz crackers for a different texture. Just don't skip the broil step—it's what creates that golden crust.
Can I add vegetables to this recipe?
Yes! Stir in 1 cup steamed broccoli florets or ½ cup sautéed mushrooms with the beef mixture. For heartier versions, try ½ cup diced bell peppers or ½ cup corn kernels. Just be sure to drain well and add them after the beef is fully cooked to avoid a watery texture.