
Main Courses
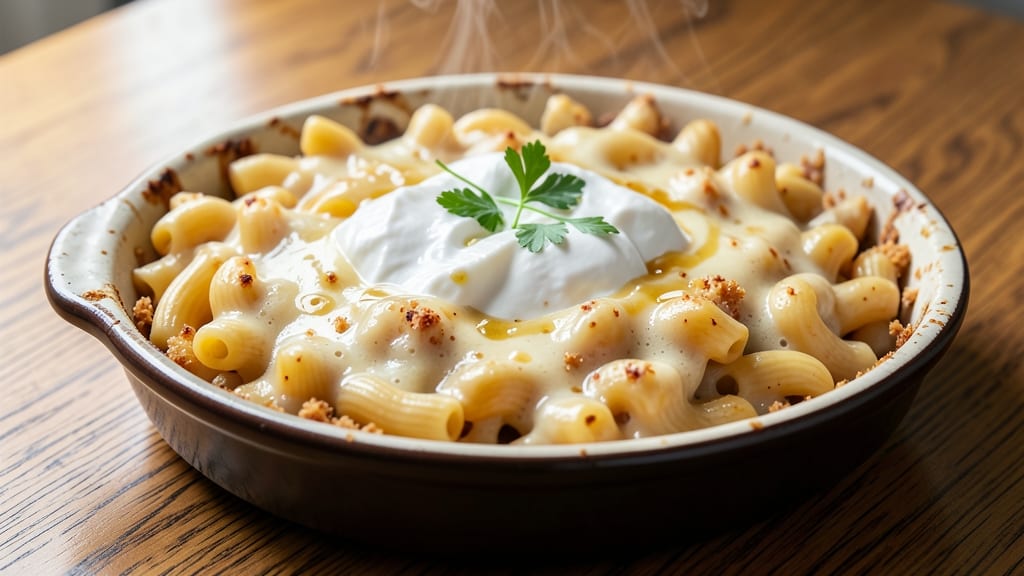
This bear mac and cheese recipe delivers the ultimate comfort food experience—rich, smoky cheddar sauce meets crispy breadcrumb topping that pulls apart like golden fur. The secret lies in a perfect balance of sharp cheddar, velvety cream, and a touch of smokiness that transforms ordinary mac into something extraordinary.
I developed this recipe after years of perfecting the art of cheesy perfection, and it never fails to impress.
What sets this apart is the pull-apart magic: a buttery breadcrumb topping that turns each bite into a crispy, cheesy delight. The sauce is made with a blend of cheddar cheeses for depth, while a hint of smoked paprika adds warmth without overpowering.
It’s the kind of dish that feels indulgent yet comes together with surprisingly simple techniques—no fancy equipment required.
The result? A creamy, smoky mac and cheese with a crust so crispy it could pass for a golden-brown bear’s hide. Each forkful delivers melt-in-your-mouth cheese sauce, while the breadcrumb topping adds texture that’s impossible to resist.
Perfect for feeding a crowd, meal prepping, or treating yourself to a cozy weeknight dinner.
Ready in just 45 minutes, this recipe is foolproof and packed with flavor. Whether you're serving it as a main course or a side dish, it’s guaranteed to become a family favorite. Let’s get cooking!
Ingredients for bear mac and cheese
These cheesy, smoky ingredients create the ultimate comfort dish with golden pull-apart magic.
| Ingredient | Amount | Notes |
|---|---|---|
| Elbow Macaroni 🍝 | 1 ½ lbs | Dry, medium or jumbo size |
| Sharp White Cheddar Cheese 🧀 | 2 cups | Shredded, block preferred |
| Medium Cheddar Cheese 🧀 | 1 ½ cups | Shredded, block preferred |
| Heavy Whipping Cream 🥛 | 1 cup | Full-fat for richness |
| Whole Milk 🥛 | 1 cup | Warmed for smooth sauce |
| Unsalted Butter 🧈 | ½ cup | Cold, cubed for sauce |
| All-Purpose Flour 🌾 | ¼ cup | For roux base |
| Smoked Paprika 🌶️ | 1 tbsp | For signature smokiness |
| Ground Black Pepper 🌶️ | ½ tsp | Freshly cracked |
| Kosher Salt 🧂 | 1 ½ tsp | Diamond Crystal preferred |
| Panko Breadcrumbs 🍞 | 1 ½ cups | For crispy topping |
| Parmesan Cheese 🧀 | ½ cup | Freshly grated, fine |
| Extra-Virgin Olive Oil 🫒 | 2 tbsp | For breadcrumb crispiness |
The cheeses are non-negotiable for that perfect balance—sharp white cheddar adds tangy bite while medium cheddar brings creaminess. Grab block cheeses from the deli counter (pre-shredded gets gummy) and shred yourself for maximum flavor. Trader Joe's carries excellent pre-shredded options if you're short on time, but nothing beats freshly grated. For the smoked paprika? Penzeys has the best selection, but any quality brand will work—just avoid the dusty old jars lurking in the back of the spice aisle. That's where the real smoky magic happens.
No sharp cheddar? Pepper jack at half the amount gives a similar kick, though it won't be quite the same. Running low on panko? Italian breadcrumbs work in a pinch, but you'll lose that perfect crunch. The breadcrumb topping is where the pull-apart magic lives—don't skip the olive oil and Parmesan. For extra richness, add 2 tbsp cream cheese to the sauce. And if you're feeling fancy, toast the breadcrumbs in the oven for 5 minutes before adding them to the top for maximum crispiness. The sauce can be made ahead and reheated—just add a splash of milk to loosen it up.
This dish reheats beautifully—5 minutes at 350°F brings it back to golden perfection. Store leftovers in an airtight container for up to 5 days, though I've never had any last that long. The breadcrumb topping stays crispy if you reheat it covered with foil for 3 minutes, then uncover to crisp up. For meal prep, make the sauce ahead and assemble just before baking—this keeps the breadcrumbs perfectly crunchy. Freezes well for up to 3 months if you're planning ahead for game day or family gatherings.
Why You'll Love This Recipe
- One-Pot Magic: I swear by this recipe because it’s literally one pot—no strainer, no extra bowls, just dump, stir, and melt. The sharp white cheddar and medium cheddar blend into that ultra-creamy sauce while the pasta cooks right in the saucepan, cutting my cleanup time in half.
- Cheddar Overload: Between us, this combo of sharp white cheddar and medium cheddar is dangerously good—sharp enough to wake up your taste buds but smooth enough to make you close your eyes. The heavy cream and whole milk turn it into a velvety hug, not some sad, watery mess.
- Leftover Hero: This mac reheats like a dream—no dry pasta, no weird textures. I make a big batch on Sundays, and it’s still creamy and delicious by Wednesday. Honestly, it’s my go-to for lazy nights or when I need to feed a crowd without stress.
- Budget Comfort: Elbow mac and cheese is already cheap, but this version feels like a fancy dinner. A block of cheddar and a carton of cream stretch far, and you’ll never miss the expensive gourmet stuff. It’s my secret weapon for feeding the family without breaking the bank.
Step-by-step instructions for smoky cheddar crunch mac and cheese
This isn't your childhood mac and cheese—it's a pull-apart masterpiece with smoky depth and buttery crunch.
Cook the Pasta Until Al Dente
Bring a large pot of water to a rolling boil and add the 1.5 lbs elbow macaroni. Stir immediately to prevent sticking. Cook for 11-12 minutes until the pasta is al dente—it should have a slight bite in the center. Drain the pasta in a colander, reserving 1 cup of pasta water in a measuring cup. This starchy liquid is essential for creating a silky sauce later.
Real talk: Overcooking pasta is the fastest way to ruin this dish. You want it tender but still holding its shape. The pasta will finish cooking in the oven, so don't be tempted to cook it all the way through on the stovetop.
Build the Ultimate Cheesy Sauce
In a large, heavy-bottomed pot, melt the 0.5 cup unsalted butter over medium heat until it's completely liquid. Add the 0.25 cup all-purpose flour and whisk continuously for 2-3 minutes until the mixture forms a smooth, pale roux. This step is crucial—it removes the raw flour taste and creates the foundation for your sauce.
Slowly pour in the 1 cup warmed whole milk and 1 cup heavy whipping cream, whisking constantly to prevent lumps from forming. Bring the mixture to a gentle simmer, then reduce heat to low. Gradually add the 2 cups sharp white cheddar cheese and 1.5 cups medium cheddar cheese, stirring until completely melted and smooth. Season with 1 tbsp smoked paprika, 0.5 tsp ground black pepper, and 1.5 tsp kosher salt. Taste and adjust seasoning—this is where the magic happens.
Combine Pasta and Sauce
Add the drained pasta to the cheese sauce and stir until every noodle is fully coated. If the sauce seems too thick, add pasta water 1 tablespoon at a time until it reaches a creamy consistency that clings to the pasta. Transfer the entire mixture to a 9x13-inch baking dish, spreading it evenly into a single layer. This even distribution ensures every bite gets that perfect cheesy crunch.
I like to give the dish a final taste at this stage. The sauce should be rich, slightly smoky, and perfectly seasoned. If it needs more depth, add a pinch more smoked paprika or a splash of pasta water to loosen it up.
Create the Crispy Topping
In a small bowl, combine the 1.5 cups panko breadcrumbs, 0.5 cup freshly grated parmesan cheese, and 2 tbsp extra-virgin olive oil. Mix with your fingers until the breadcrumbs are evenly coated and slightly clumped. This topping is what transforms ordinary mac and cheese into a showstopping dish.
Sprinkle the breadcrumb mixture evenly over the top of the mac and cheese, pressing down gently to help it adhere. The goal is to create a continuous layer that will crisp up beautifully in the oven. If you have any extra topping, save it for garnish later—it's too good to waste.
Bake to Golden Perfection
Preheat your oven to 375°F. Place the baking dish on the middle rack and bake for 20-25 minutes until the top is deep golden brown and the edges are bubbling. The breadcrumbs should be crispy enough to hold their shape when you press down gently with a spoon.
Here's the thing—don't open the oven door during baking. Every time you peek, you release heat and steam, which can lead to a soggy top. Trust the timer and the visual cues. When it's done, let the mac and cheese rest for 5-10 minutes before serving. This resting period allows the sauce to set slightly, making it easier to cut and serve without losing that perfect pull-apart texture.
Pro Tips For Making Bear Mac And Cheese
- Cook Pasta Al Dente: Bear mac and cheese demands chewy, not mushy, elbows—pull them out when they’re still slightly firm (about 1 minute before package time). I learned this the hard way after turning my first batch into a gluey disaster; undercooked pasta holds up better to the sauce’s weight.
- Grate Cheese Fresh: Pre-shredded cheese has anti-caking agents that make the sauce grainy. Grate sharp white cheddar and medium cheddar yourself—use the large holes on your box grater for a smoother melt. Yes, it’s extra work, but the texture difference is night and day.
- Temper the Cream: Warm the heavy whipping cream and milk together over low heat until steaming but not boiling—just 160°F (70°C)—before mixing it with the cheese. Cold cream curdles hot cheese, and nobody wants scrambled mac and cheese.
- Salt the Water Hard: Add 2 tablespoons of salt to the pasta water (yes, even if your pasta is labeled "enhanced"). The flavor carries through the sauce, and trust me, you’ll taste the difference in every bite—especially with the sharp cheddar.
Essential equipment for perfect results
Pasta Pot Essentials
You don't need a fancy kitchen to make this mac and cheese, but a few key tools make all the difference. Start with a large, deep pot (I use my All-Clad 8-quart Dutch oven) for cooking the pasta—it needs to fit comfortably with plenty of room to stir.
A fine-mesh colander with a wide rim helps drain pasta efficiently, and I keep mine nearby to avoid spills. For the sauce, a heavy-bottomed saucepan (like my Le Creuset 3-quart) prevents scorching and ensures even heating. 🍲
Sauce-Making Tools
The secret to a silky sauce lies in your whisk and measuring cup. A balloon whisk (I love the OXO Good Grips) blends the roux smoothly, while a liquid measuring cup with spout makes adding milk and cream precise.
For shredding cheese, a box grater (the Microplane is my go-to) gives you control over texture—avoid pre-shredded cheese, which contains anti-caking agents that make the sauce grainy. A fine-mesh strainer also comes in handy if you want to remove any stray cheese bits from the sauce.
Baking Dish Must-Haves
Your baking dish is where the magic happens, so choose wisely. A 9x13-inch glass baking dish (like Pyrex) distributes heat evenly and makes it easy to see when the breadcrumbs turn golden.
For extra crispiness, I recommend baking on the middle rack—this ensures even browning without burning the edges. If you're short on time, a baking stone placed underneath the dish can help create a crispier crust, but it’s not essential.
Pro tip: Line the dish with parchment paper for easy cleanup, but leave the edges uncovered so the breadcrumbs can crisp up properly. 🔥
Topping Prep Station
The breadcrumb topping deserves its own prep space. A small mixing bowl (I use a Corelle 8-inch) holds the panko, Parmesan, and olive oil, while a rubber spatula helps mix it evenly.
For pressing the topping into place, I use the back of a large spoon or a wet spatula—this prevents the breadcrumbs from sticking to your fingers. If you’re feeling fancy, a pastry brush can help distribute the olive oil more evenly before adding the topping.
And don’t forget a small plate to catch any stray crumbs—trust me, you’ll want every last one. 🧂
Oven and Timing
A reliable oven thermometer (I swear by the Thermoworks Oven Thermometer) ensures your oven is actually at 375°F—many home ovens run hot or cold, and this affects your breadcrumb crispiness.
For even baking, I recommend using the convection setting if your oven has it, which circulates air and speeds up browning. A timer (or your phone alarm) keeps you from overbaking—this dish is all about that perfect golden crust, not a burnt top.
And finally, a spatula with a long handle helps transfer the hot dish from oven to table safely. 🕒
Nutrition facts
Frequently asked questions
Why does this mac and cheese have a smoky flavor?
The signature smokiness comes from 1 tablespoon smoked paprika in the cheese sauce. This spice adds depth without overpowering the creamy cheddar flavors. For extra smokiness, you could substitute half the paprika with ½ teaspoon chipotle powder or a pinch of liquid smoke (use sparingly!).
Can I make this mac and cheese ahead of time?
Assemble the dish (including topping) up to 24 hours ahead and refrigerate uncovered. When ready to bake, cover with foil and bake at 375°F for 25-30 minutes (add 5 minutes if it's cold). For the crispiest topping, broil for 2-3 minutes at the end. The sauce may thicken slightly when chilled—just add a splash of milk when reheating.
What if I don't have panko breadcrumbs?
Don't worry—you can use Italian breadcrumbs or even crush up 1 cup of stale bread into fine crumbs. For extra crunch, toast them in a dry skillet over medium heat for 3-4 minutes before mixing with Parmesan and olive oil. The texture won't be identical, but it'll still deliver that satisfying crunch!
How do I keep the breadcrumb topping from getting soggy?
The key is baking time and technique! First, press the topping firmly into the sauce before baking. Then, bake at 375°F for 20-25 minutes without opening the oven door. For extra insurance, you can broil for 1-2 minutes at the very end. If your topping still seems damp, bake uncovered for an additional 5 minutes.
Can I add other ingredients like bacon or veggies?
Yes! Cook ½ lb bacon until crispy and crumble it into the sauce, or stir in 1 cup steamed broccoli or ½ cup diced jalapeños for heat. For a "bear"-themed twist, try adding ½ cup cooked ground beef (seasoned like chili) or ½ cup caramelized onions for sweetness. Just reduce the cheese slightly if adding extra moisture from cooked ingredients.