
Main Courses
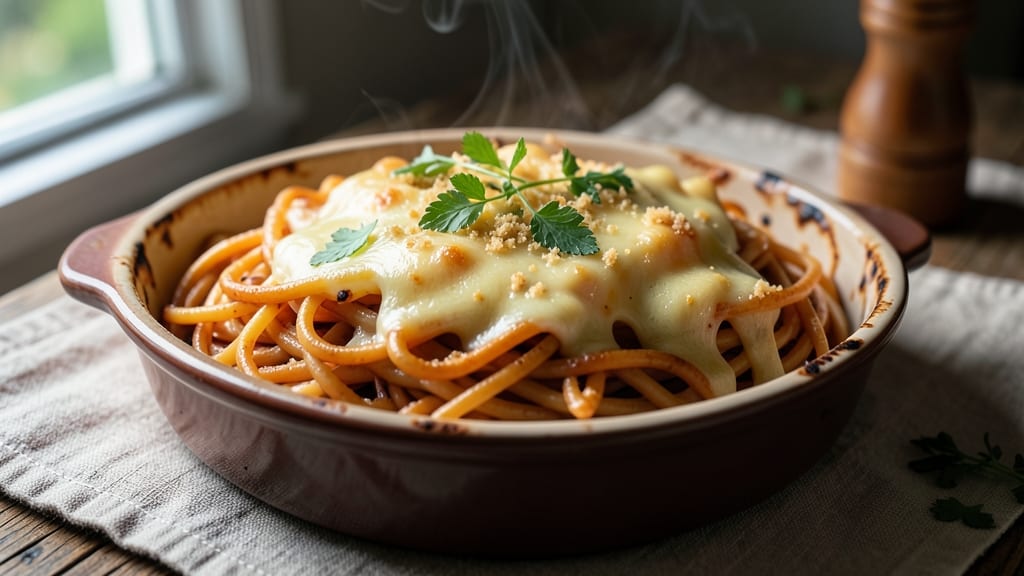
This baked spaghetti mac and cheese delivers the ultimate comfort food experience—crispy golden edges, gooey pull-apart layers, and that perfect blend of creamy cheese and al dente pasta.
The secret lies in using spaghetti for its sturdy shape, which holds up beautifully during baking while creating those coveted crispy bits on top.
I've perfected this recipe over years of testing, ensuring every bite has the right texture: tender pasta, rich cheese sauce, and a crust that's impossible to resist.
The process starts with classic stovetop pasta, then builds a velvety cheese sauce using a mix of sharp cheddar, Gruyère, and cream cheese for depth. What sets this apart is the baking technique—covering with breadcrumbs creates that signature crispy top while keeping the interior luxuriously creamy.
The result is a dish that's hearty enough for a main course but simple enough for a weeknight dinner. No fancy equipment needed, just a few essential ingredients and patience for the perfect bake.
By the time it emerges from the oven, you'll have a dish that looks as impressive as it tastes—golden brown on top, with cheese pulling in strings and pasta peeking through. The aroma alone will have everyone gathering around the table.
This is the kind of mac and cheese that turns ordinary dinners into memorable meals, and it's surprisingly easy to achieve with the right technique.
Serve with a simple green salad or garlic bread to soak up every last bit of that rich cheese sauce. The leftovers reheat beautifully too, making this a perfect make-ahead option for busy families. Let's get started on creating your ultimate baked spaghetti mac and cheese.
Ingredients for baked spaghetti mac and cheese
These 14 ingredients transform into the ultimate crispy-topped baked spaghetti mac and cheese.
| Ingredient | Amount | Notes |
|---|---|---|
| Spaghetti 🍝 | 12 oz | Uncooked, broken in half |
| Sharp White Cheddar Cheese 🧀 | 2 cups | Shredded, block preferred |
| Gruyère Cheese 🧀 | 1 cup | Shredded, aged 6+ months |
| Cream Cheese 🧈 | 8 oz | Full-fat, softened |
| Heavy Whipping Cream 🥛 | ½ cup | Full-fat for richness |
| Unsalted Butter 🧈 | 4 tbsp | Melted, salted added later |
| All-Purpose Flour 🌾 | 2 tbsp | For roux, unsifted |
| Panko Breadcrumbs 🍞 | ½ cup | For crispy topping |
| Parmesan Cheese 🧀 | ¼ cup | Freshly grated, for topping |
| Garlic Powder 🧄 | ½ tsp | For extra flavor |
| Dried Mustard 🌶️ | ¼ tsp | For depth of flavor |
| Salt 🧂 | 1 ½ tsp | Kosher or sea salt |
| Black Pepper 🌶️ | ½ tsp | Freshly ground |
| Milk 🥛 | 1 cup | Whole milk preferred |
The cheeses are non-negotiable for that perfect balance—sharp white cheddar for tang, Gruyère for nutty depth, and cream cheese for velvety texture. I always grab block cheddar and Gruyère from the deli counter (pre-shredded gets clumpy), and Kraft Natural for the cream cheese since it's consistently smooth. Whole milk and full-fat cream make the sauce truly luxurious—none of that skim stuff here. For the spaghetti, De Cecco or Barilla hold up best during baking. The Panko breadcrumbs from Trader Joe's are my secret for that ultra-crispy top—they're lighter than regular breadcrumbs and toast perfectly.
No sharp cheddar? Extra-sharp white cheddar works in a pinch, or swap half for Monterey Jack if you're in a hurry. Gruyère hard to find? Parmigiano-Reggiano adds similar richness. Out of heavy cream? Half-and-half stretches it but thins the sauce slightly. The Panko can be swapped for Italian breadcrumbs (just add a pinch more garlic powder). Dried mustard missing? A dash of Dijon mustard in the sauce does the trick. Salt the pasta water well—it makes a huge difference in flavor. And if your Parmesan is pre-grated, toast it in a dry pan first to remove moisture for extra crispiness on top.
This dish reheats like a dream—honestly better the next day as the flavors meld. Store leftovers covered in the fridge for up to 4 days, then pop in the oven at 375°F for 15-20 minutes until bubbly. For freezing, assemble the dish but skip the breadcrumb topping—add it fresh after baking from frozen. Make ahead tip: Prep the cheese sauce and refrigerate it overnight—it gets even creamier. The spaghetti keeps its bite when baked, but if it's ever too soft, just bake 5 minutes longer. Portion into individual dishes before baking for easy serving.
Why You'll Love This Recipe
- One-Pot Magic: I swear by this recipe because it’s all in one dish—no boiling pots, no messy sauces. Just toss the spaghetti with that sharp cheddar, Gruyère, and cream cheese, then bake until golden. Honestly, the cleanup is half the battle won.
- Creamy Crunch Perfection: Between us, the combo of Gruyère and cream cheese makes this ridiculously good—smooth in the middle, crispy on top. That’s the kind of mac and cheese where you’ll reach for seconds without thinking.
- Weeknight & Party Star: It’s my go-to for busy nights, but also? People always ask for seconds at gatherings. Serve it as a side or a main—it’s that versatile. (Yes, even on a Tuesday night.)
- Budget-Friendly Leftovers: Sharp cheddar and Gruyère stretch this dish far, and it reheats like a dream. I make a big batch, freeze half, and still have a solid lunch later. Not the prettiest, but the taste makes up for it.
Step-by-step instructions for baked spaghetti mac and cheese
Here's the method for that perfect combination of crispy golden crust and gooey, pull-apart layers.
Cook the Spaghetti Al Dente
Bring a large pot of water to a rolling boil and add 1 tablespoon of salt—it should taste like the ocean. Add the 12 oz spaghetti (broken in half for even cooking) and stir immediately to prevent sticking. Cook for 2 minutes less than package directions for al dente pasta—you want it to finish cooking in the oven.
Real talk: Undercooked pasta in the oven is a disaster. You'll know it's ready when you can still feel a slight bite in the center. Drain the pasta and set it aside, reserving 1 cup of pasta water—this starchy liquid is pure gold for creating a silky sauce later. Don't rinse the pasta; the starch helps the cheese cling beautifully.
Make the Ultra-Creamy Cheese Sauce
In a large, deep skillet, melt 4 tablespoons unsalted butter over medium heat until it foams. Add 2 tablespoons all-purpose flour and whisk vigorously for 1-2 minutes until you have a smooth, bubbling roux that smells like pure comfort. This is your sauce foundation—don't rush it or it'll taste raw.
Slowly pour in 1 cup milk while whisking constantly to prevent lumps. Add 8 oz softened cream cheese and stir until completely melted and smooth. Now for the cheese magic: Add 2 cups shredded sharp white cheddar cheese and 1 cup shredded Gruyère cheese, stirring until fully melted. The sauce should be velvety and thick enough to coat the back of a spoon.
Here's the thing—Gruyère adds that perfect nutty depth, while the cheddar gives that classic tang. If the sauce looks too thick, whisk in 2-3 tablespoons of reserved pasta water to loosen it. You want it to coat the pasta beautifully but still hold its shape when layered.
Combine Pasta and Cheese
Add the cooked spaghetti to the cheese sauce and toss gently until every strand is fully coated. You want each noodle to be completely enrobed in that creamy cheese blanket. Transfer the mixture to a greased 9x13-inch baking dish, spreading it out evenly. The sauce should come up about halfway—this ensures those pull-apart layers when baked.
Sprinkle half of the 0.5 cup Panko breadcrumbs evenly over the top. This is what creates that gorgeous crispy crust we're after. The Panko stays light and airy while regular breadcrumbs would get dense. Press down gently with the back of a spoon to help them adhere to the cheese.
Create the Crispy Topping
In a small bowl, mix together the remaining 0.5 cup Panko breadcrumbs, 0.25 cup freshly grated Parmesan cheese, 0.5 teaspoon garlic powder, 0.25 teaspoon dried mustard, 1 teaspoon salt, and 0.5 teaspoon black pepper. The mustard adds that subtle tang that makes this recipe sing. Sprinkle this mixture evenly over the top of the mac and cheese.
Drizzle 0.5 cup heavy whipping cream evenly over the top—this adds richness and helps create that golden, bubbly crust. The cream will bubble up during baking, creating those beautiful blisters we all love. Don't skip this step—it's what takes this dish from good to showstopping.
Bake to Golden Perfection
Preheat your oven to 375°F while you prepare the mac and cheese. Bake uncovered for 25-30 minutes until the top is deep golden brown and the edges are bubbling. You'll see those gorgeous blisters forming—that's your signal that it's ready.
For the final touch, broil for 1-2 minutes until the top is even more golden and crispy. Watch it closely—broilers can be aggressive! Let the mac and cheese rest for 5-10 minutes before serving. This resting period allows the layers to set slightly, making it easier to get those perfect pull-apart pieces.
Serve immediately with a crisp green salad and extra garlic bread on the side. The contrast of the cool salad and warm, gooey mac and cheese is pure perfection. Each bite should deliver that perfect combination of crispy top, creamy sauce, and al dente pasta—no dry bites or watery sauce here!
Pro Tips For Making Baked Spaghetti Mac And Cheese
- COOK PASTA AL DENTE: I used to overcook the spaghetti for this dish, thinking it would absorb more cheese sauce—but it turns to mush in the oven. Cook it al dente (1 minute less than package instructions), then drain and rinse briefly with cold water. The residual starch helps the sauce cling, and the pasta holds its shape even after baking.
- GRATE CHEESE FINE: Skip the box grater and pulse sharp white cheddar and Gruyère in a food processor for 10 seconds—this melts them faster and gives a smoother texture. If you’re doing it by hand, resist the urge to go coarse; tiny shreds melt evenly, while big chunks turn to rubbery clumps. (Yes, even if you’re impatient like me.)
- SALT THE CREAM SAUCE: The cream cheese-heavy cream base is where flavor hides or disappears. Before adding the cheese, bring the cream to a simmer and season it with ½ teaspoon salt—this carries through the entire dish. Trust me, the bland sauce is the most common reason baked mac and cheese feels flat.
- BAKE COVERED THEN UNCOVERED: Start the mac and cheese at 375°F (190°C) covered with foil for 20 minutes—this builds a thick, creamy layer without burning the top. Then uncover and crank the heat to 425°F (220°C) for the last 5-7 minutes to get that golden, bubbly crust. (Your future self will thank you.)
Make-ahead tips for leftovers
Prep Ahead Strategy
Assemble the entire dish up to 24 hours in advance and refrigerate uncovered. The cold helps the cheese firm up slightly, making those pull-apart layers even more dramatic when baked. I always prep mine the night before—it's a total game-changer for weeknight dinners.
Just cover with foil and bake straight from the fridge, adding 5-10 extra minutes to the baking time. 💪
Freezer-Friendly Assembly
For longer storage, assemble the mac and cheese in your baking dish but skip the breadcrumb topping. Cover tightly with plastic wrap and foil, then freeze for up to 2 months. When ready to serve, thaw overnight in the fridge, add the breadcrumb mixture fresh, and bake as directed.
The texture remains creamy and the flavors intensify after freezing. Trust me, it's like having restaurant-quality comfort food at home.
Cheese Sauce Prep
Make the cheese sauce up to 3 days ahead and store it in an airtight container in the fridge. The flavors deepen and it becomes even more velvety. When you're ready to assemble, simply mix it with the cooked pasta and proceed with the recipe.
I do this all the time when I'm short on time—I just reheat the sauce gently on the stovetop before combining. This is my secret for stress-free weeknight cooking. ✨
Portion Control Tips
Divide the baked mac and cheese into individual 8x8-inch baking dishes before the final baking. This makes serving effortless and ensures everyone gets that perfect crispy-topped portion. I use silicone baking cups for easy transport—great for potlucks or meal prep.
Just bake the portions together on the same sheet for even cooking. The individual servings reheat beautifully too, making leftovers a breeze. 🍽️
Oven-Friendly Make-Ahead
If you're prepping for a crowd, bake the mac and cheese completely ahead of time and refrigerate. Reheat portions in the oven at 350°F for 15-20 minutes until bubbly. The texture holds up surprisingly well, and the crispy top actually becomes even more pronounced after reheating.
I've done this for holiday gatherings—it's a total hit and saves me from last-minute stress. Just add fresh breadcrumbs before serving if you want that perfect crunch. 🔥
Kid-Friendly Prep
For picky eaters, assemble the mac and cheese in small ramekins or individual cups before baking. This lets kids customize their own portions with different toppings like extra cheese or bacon bits.
I've found that when kids can see and interact with their food, they're much more likely to try it. Plus, the ramekins make cleanup a breeze—just pop them in the dishwasher. It's a win-win for busy parents. 💛
Nutrition facts
Frequently asked questions
Why does this recipe use spaghetti instead of elbow macaroni?
Spaghetti's long strands hold up better during baking, creating those coveted pull-apart layers while maintaining texture. The shape also makes it easier to get that crispy top without turning into mush. Plus, the strands create beautiful visual appeal when served.
Can I make this dish vegetarian?
This recipe is already vegetarian—just ensure your cheeses are dairy-based (not powdered) and verify any breadcrumbs for meat additives. For extra richness, consider adding sautéed mushrooms or roasted bell peppers to the cheese sauce.
What's the secret to getting that perfect crispy top?
The magic comes from the Panko breadcrumb mixture and heavy cream topping. The Panko stays light while regular breadcrumbs get dense, and the cream creates those beautiful blisters during baking. Don't skip the broiling step—it adds that final golden crunch!
How do I fix runny cheese sauce?
If your sauce is too thin, remove the baking dish from the oven and sprinkle 1-2 tablespoons of breadcrumbs on top, then return to the oven for 5-10 minutes to crisp. For future batches, ensure your cheese is fully melted before combining with pasta, and use slightly less milk.
Can I use this recipe for a potluck?
Perfect for potlucks! Assemble individual portions in 8x8-inch baking dishes before baking. They reheat beautifully and the crispy tops stay intact. Just cover with foil when transporting to keep them warm, then uncover and broil for 2 minutes before serving.