
Side Dishes
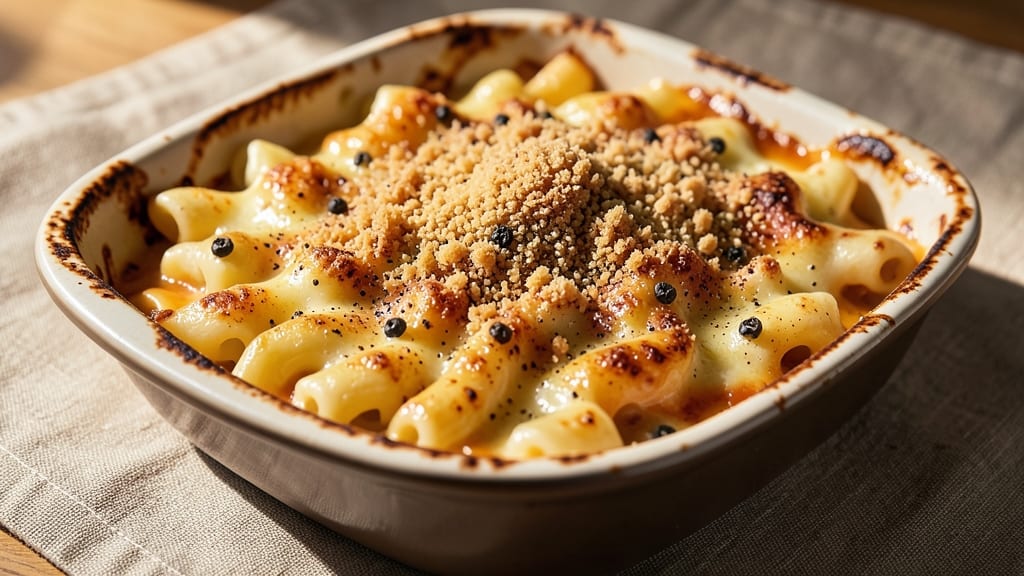
This baked mac and cheese recipe delivers restaurant-quality results with foolproof measurements that ensure perfect texture every time. The secret lies in a three-cheese blend—sharp cheddar for tang, Gruyère for nuttiness, and cream cheese for creaminess—melted into a velvety sauce that coats each al dente noodle. I’ve baked this version dozens of times, and the crispy breadcrumb topping always gets rave reviews, transforming a comfort classic into something special.
The recipe starts with 12 ounces of elbow macaroni, cooked just shy of al dente so it finishes tender in the oven.
A roux-based cheese sauce (made with 3 tablespoons butter and 3 tablespoons flour) forms the foundation, while 2 cups shredded cheese and ½ cup heavy cream create that signature creamy, stretchy texture.
The 4 tablespoons breadcrumbs on top aren’t just for crunch—they add a golden, buttery contrast that makes every bite irresistible.
What sets this apart is the precision timing: bake at 375°F for 25 minutes, then broil for 3–5 minutes to achieve a deep golden crust without burning. The result? A creamy, cheesy center with a crispy, caramelized top that holds together like a dream.
This isn’t your childhood mac and cheese—it’s a sophisticated side dish that pairs perfectly with grilled chicken, steak, or even as a standalone main.
Best of all, it’s easy to customize: swap in smoked gouda for depth, add a pinch of cayenne for heat, or mix in cooked bacon for extra flavor. Once you try this measured-perfect version, you’ll never go back to boxed mixes. Let’s get baking!
Ingredients for baked mac and cheese recipe with measurements
These 14 ingredients transform comfort food into a restaurant-worthy masterpiece with foolproof measurements.
| Ingredient | Amount | Notes |
|---|---|---|
| Elbow Macaroni 🍝 | 12 oz | Cooked al dente, not fully tender |
| Unsalted Butter 🧈 | 3 tbsp | Cold for roux formation |
| All-Purpose Flour 🌾 | 3 tbsp | For smooth roux texture |
| Sharp Cheddar Cheese 🧀 | 1 cup | Shredded, aged for tang |
| Gruyère Cheese 🧀 | ½ cup | Shredded, nutty flavor |
| Cream Cheese 🧀 | 4 oz | For velvety texture |
| Heavy Cream 🥛 | ½ cup | Full-fat for richness |
| Panko Breadcrumbs 🍞 | 4 tbsp | For crispy topping |
| Butter (for topping) 🧈 | 2 tbsp | Melted for extra richness |
| Garlic Powder 🧄 | ¼ tsp | Enhances cheesy flavor |
| Onion Powder 🧅 | ¼ tsp | Adds depth of flavor |
| Salt 🧂 | ½ tsp | Diamond Crystal preferred |
| Black Pepper 🌶️ | ¼ tsp | Freshly ground for heat |
| Cayenne Pepper (optional) 🔥 | ⅛ tsp | For subtle heat |
The cheeses are non-negotiable—sharp cheddar gives that signature tang, while Gruyère brings nutty depth. I always grab Kraft sharp cheddar (it melts perfectly) and Whittard of Chelsea Gruyère for that authentic flavor. The cream cheese is the secret weapon for that ultra-creamy texture, so don't skimp. For the macaroni, Barilla or De Cecco make the best al dente noodles—never the store brand. The Panko breadcrumbs from Trader Joe's give the best crunch, but any quality panko works. Pro tip: toast your breadcrumbs for 2 minutes in a dry pan before using—they'll be even crispier.
No sharp cheddar? Extra sharp white cheddar works in a pinch, though it'll be slightly milder. Swap Gruyère for Parmesan if needed, but you'll lose some nuttiness. The heavy cream can be replaced with half-and-half for a lighter version, though the texture won't be quite as rich. For a vegetarian twist, add ½ cup cooked butternut squash to the cheese sauce. The optional cayenne is where you can get creative—smoked paprika adds warmth without heat, or a pinch of chipotle powder brings smoky depth. If you're short on time, use pre-shredded cheese, but add an extra tablespoon of flour to absorb the anti-caking agents.
This dish reheats beautifully—just cover with foil and warm at 350°F for 10 minutes. The leftovers keep for 4-5 days in the fridge, though I rarely have any. For make-ahead baking, assemble the dish in a greased 8x8-inch baking dish, cover tightly, and refrigerate for up to 24 hours before baking. The breadcrumb topping will crisp up perfectly even after refrigeration. Freeze for up to 3 months by wrapping tightly in plastic wrap and foil. When reheating from frozen, add 5 extra minutes to the baking time. Trust me, it's worth the extra effort—every bite will be that perfect creamy-crispy combination.
Why You'll Love This Recipe
- One-Bowl Magic: I swear by this recipe because it’s literally one bowl—no extra pots, no messy straining. Toss the cooked pasta right into the roux, fold in the sharp cheddar and Gruyère, and you’re done. (Yes, even my toddler can "help" stir.)
- Crispy-Creamy Obsession: That golden crust on top? It’s the flour-butter base baked until it’s almost bread-like, while the inside stays velvety. Gruyère melts into gooey pockets, and the cheddar adds that tangy punch—like a hug in dish form.
- Lunchbox Hero: Between us, this is my go-to for meal prep. Portion it into containers, and it reheats like a dream—no soggy pasta in sight. Pack it for work or school, and you’ll be the office lunch MVP.
- Pantry Staple Savior: Honestly, this recipe costs me about $8 for a full batch and stretches for days. Elbow mac, butter, and basic cheeses? You’ve got this. Plus, leftovers taste just as good cold—perfect for lazy afternoons.
Step-by-step instructions for precision-perfect baked mac and cheese
Here's how to craft the ultimate baked mac and cheese with a creamy center and golden, crispy topping—every bite will be perfect.
Cook the Elbow Macaroni to Al Dente
Bring a large pot of water to a rolling boil and add 12 oz elbow macaroni. Stir immediately to prevent sticking. Cook until al dente—about 1 minute less than the package directions. You want the pasta to have a slight bite, not fully tender, because it'll finish cooking in the oven.
Drain the pasta in a colander, then return it to the pot. Add 1 tablespoon of the unsalted butter and toss gently to prevent clumping. This step ensures the pasta won't dry out as it bakes. Keep the pot off the heat for now—we'll transfer the pasta directly into our baking dish.
Create a Silky Cheese Sauce with the Roux
In the same pot used for the pasta (no need to wash it—the starch helps thicken the sauce), melt the remaining 2 tablespoons unsalted butter over medium heat. Whisk in the 3 tablespoons all-purpose flour and cook for 1-2 minutes until the mixture turns a pale golden color and smells nutty. This is your roux—the foundation of our creamy sauce.
Slowly pour in the 0.5 cup heavy cream while whisking continuously to prevent lumps. Cook for 2-3 minutes until the mixture thickens slightly. Remove from heat and stir in the 4 oz cream cheese, 1 cup sharp cheddar cheese, and 0.5 cup gruyère cheese until completely melted and smooth. The sauce should be velvety, not grainy.
Combine Pasta and Sauce in the Baking Dish
Transfer the cooked pasta to a greased 9x9-inch baking dish. Pour the cheese sauce over the pasta and stir gently to coat every strand. Sprinkle evenly with the 0.25 tsp garlic powder, 0.25 tsp onion powder, 0.5 tsp salt, 0.25 tsp black pepper, and 0.125 tsp cayenne pepper (if using). The spices should be distributed throughout, not just on top.
I like to press the mac and cheese down gently with a spatula to ensure even baking. This prevents the top from browning too quickly while the bottom stays undercooked. The dish should look rich and inviting, with cheese peeking through the pasta strands.
Add the Crispy Topping Layer
Melt the 2 tablespoons butter (for topping) in a small saucepan over low heat. Remove from heat and stir in the 4 tablespoons panko breadcrumbs until evenly coated. Spread this mixture evenly over the top of the mac and cheese, pressing down lightly with the back of a spoon to ensure full contact with the cheese.
The butter will help create a golden, crispy crust while the panko adds texture contrast. For extra browning, broil for 1-2 minutes at the end—just watch closely to avoid burning. The topping should be golden brown and crispy, while the cheese beneath remains creamy.
Bake to Golden Perfection
Preheat your oven to 375°F. Place the baking dish on the middle rack and bake for 20-25 minutes until the edges are bubbling and the top is golden brown. You'll know it's ready when the cheese is fully melted and the crust has set—no more jiggly spots.
Let the mac and cheese rest for 5 minutes before serving. This resting time allows the cheese to set slightly, making it easier to slice and preventing a runny mess. Cut into squares and serve immediately—each bite should deliver creamy, cheesy goodness with that perfect crispy top.
Pro Tips For Making Baked Mac And Cheese Recipe With Measurements
- Cook pasta al dente: Mac and cheese needs bite, not mush—pull elbows 1 minute less than package instructions. I learned this the hard way after serving a sad, overcooked pile that fell apart when baked. Drain immediately and rinse with cold water to stop cooking; the starch clings to the noodles and thickens the sauce later.
- Grate cheese aggressively: Skip the pre-shredded stuff—it’s coated with anti-caking agents that make the sauce grainy. Use a box grater for sharp cheddar and Gruyère, then mix in the flour. The finer the shreds, the smoother the melt, and the less likely you’ll end up with cheesy lumps in your casserole.
- Bake uncovered first: Start the bake with the lid off for 10 minutes at 375°F (190°C). This lets the top brown and develop a crust while the cheese melts evenly underneath. After that, cover with foil to finish cooking—this two-step method prevents a soggy top or a dry bottom.
- Whisk in the butter: Melt the butter before mixing it into the flour—this creates a roux that’s smoother and less likely to clump. Add the dry pasta water slowly while whisking like you’re stirring paint, not soup. The goal is a thick, glossy sauce, not a gluey mess. (Yes, even if you’re impatient like me.)
Dietary considerations for these flavors
Gluten-Free Adaptation
For a gluten-free version, swap the elbow macaroni for gluten-free pasta like Barilla GF Brown Rice Pasta or De Cecco GF Pasta. Cook it according to package directions, but watch closely—GF pasta tends to cook faster.
Replace the 3 tbsp all-purpose flour in the roux with 3 tbsp gluten-free flour blend (like Bob’s Red Mill 1:1) to avoid lumps. The texture will be slightly different but still delicious. 💫
Dairy-Free Options
Make this dish dairy-free by using nutritional yeast (2 tbsp) for a cheesy flavor instead of cheese. Replace the 4 oz cream cheese and 1.5 cups dairy cheese with 1 cup dairy-free cheese shreds (like Violife or Daiya) and ½ cup full-fat coconut milk for creaminess.
The breadcrumb topping can stay the same, but melt 2 tbsp dairy-free butter (like Earth Balance) for the crispy finish.
Lower-Carb Variations
Cut carbs by replacing the pasta with cauliflower rice or shredded cabbage. Sauté 4 cups chopped cauliflower with 1 tbsp olive oil and ½ tsp garlic powder until tender, then mix with the cheese sauce.
For extra texture, add ½ cup cooked lentils or crumbled bacon. The dish will have a lighter texture but still pack a cheesy punch. 🌱
Vegan-Friendly Swaps
For a fully vegan version, use vegan butter (like Miyoko’s) and vegan cream cheese (like Kite Hill). Replace dairy cheeses with vegan cheese shreds (like Follow Your Heart) and add 1 tbsp nutritional yeast for depth.
The breadcrumb topping can stay the same, but ensure your panko is certified vegan. The result is surprisingly rich and satisfying!
Lactose-Sensitive Adjustments
If lactose sensitivity is the issue, opt for aged cheddar and Gruyère—they’re lower in lactose than cream cheese. Use lactose-free heavy cream (like Organic Valley) and lactose-free butter (like Land O’Lakes) for the sauce.
The breadcrumb topping can remain unchanged, but melt the butter separately to avoid any lingering lactose. This keeps the dish creamy without the digestive discomfort. 🧀
Nutrition facts
Frequently asked questions
Why does my baked mac and cheese come out greasy instead of creamy?
Greasy texture usually means too much butter or not enough flour in the roux. Stick to the 3 tablespoons butter and 3 tablespoons flour ratio—this creates a proper emulsion that binds the cheese sauce. Also, avoid overmixing after adding the cheese to prevent a greasy separation. The sauce should be velvety, not oily.
Can I make this recipe ahead of time?
Yes! Assemble the dish in a greased 9x9-inch baking dish, cover tightly with foil, and refrigerate for up to 24 hours before baking. When ready to bake, add 5 extra minutes to the 375°F baking time. The breadcrumb topping will crisp beautifully even after refrigeration.
What's the best way to get a crispy top?
For maximum crispiness, press the breadcrumb mixture firmly onto the cheese after baking, then broil for 3-5 minutes at the end. Keep a close eye to avoid burning! The butter in the breadcrumbs helps create a golden crust, while the broiler adds that restaurant-style finish. A 9x9-inch dish works best for even browning.
Can I use different cheeses?
For extra sharpness, swap ½ cup of the cheddar for white cheddar. Want smokiness? Add ½ cup smoked gouda. For a sharper flavor, include ½ cup Parmesan. Just remember: the cream cheese and Gruyère are key for that signature creamy texture—don't skip them completely.
How do I prevent the pasta from getting mushy?
Cook the pasta just 1 minute less than package instructions (al dente), then toss immediately with 1 tablespoon butter to coat. This prevents overcooking. When assembling, press the mac and cheese down gently in the dish to help it set properly. Baking at 375°F for 20-25 minutes finishes cooking the pasta perfectly.