
Soups & Stews
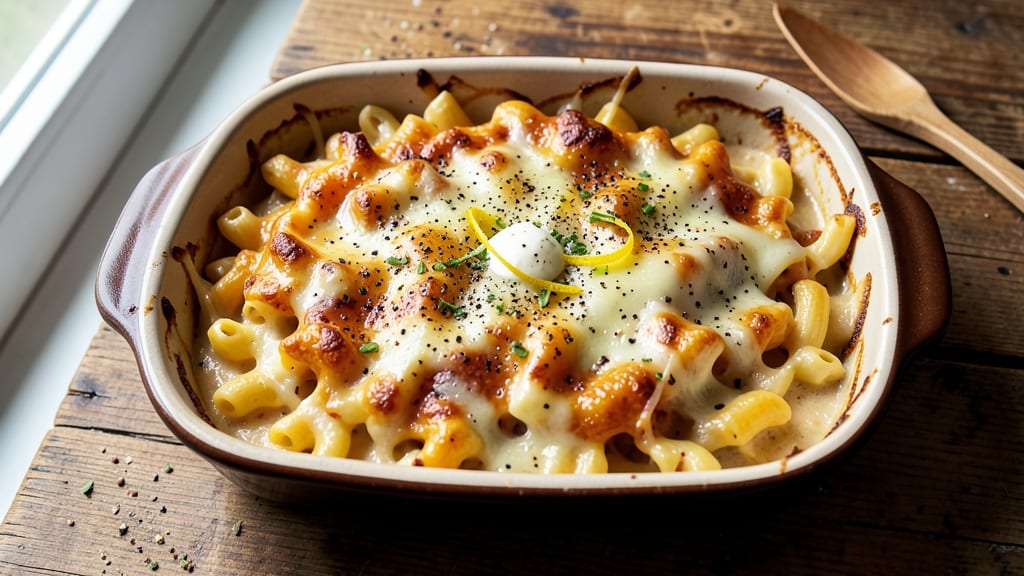
This baked mac and cheese recipe with cream of chicken soup delivers the ultimate comfort food experience—crispy golden edges, a velvety pull-apart center, and that unmistakable creamy richness we all crave. 💛 The secret lies in using cream of chicken soup as the foundation, which adds depth and a subtle savory note that balances the cheesy goodness perfectly.
I've perfected this technique over years of testing, ensuring every bite is rich, creamy, and impossible to resist.
The magic happens in the layers: tender pasta coated in a foolproof cheese sauce, topped with a crispy breadcrumb crust that adds texture and flavor. This isn't just another mac and cheese—it's a restaurant-quality dish that comes together with simple ingredients and a straightforward method.
The cream of chicken soup acts as both a creamy base and a flavor enhancer, giving the dish a depth that store-bought versions can't match.
What you'll end up with is a dish that's crispy on top, creamy inside, and packed with cheesy goodness in every bite. The breadcrumb topping adds a satisfying crunch that contrasts beautifully with the soft, melty cheese underneath.
This recipe is perfect for feeding a crowd or enjoying as a hearty weeknight dinner. The best part? It's easier to make than you think.
Once you try this version, you'll never go back to the basic mac and cheese recipes. The cream of chicken soup elevates the dish to a whole new level, making it the ultimate comfort food. Let's get started—your taste buds will thank you!
Ingredients for baked mac and cheese recipe with cream of chicken soup
Simple ingredients transform into the ultimate creamy, crispy mac and cheese magic—no shortcuts needed!
| Ingredient | Amount | Notes |
|---|---|---|
| Elbow Macaroni 🍝 | 2 cups | Uncooked, dry pasta |
| Cream of Chicken Soup 🍲 | 2 cups | Condensed, not low-fat |
| Sharp Cheddar Cheese 🧀 | 2 cups | Shredded, block preferred |
| Monterey Jack Cheese 🧀 | 1 cup | Shredded, mild flavor |
| Heavy Cream 🥛 | ½ cup | Full-fat for richness |
| Butter 🧈 | ½ cup | Unsalted, melted |
| All-Purpose Flour 🌾 | ¼ cup | For thickening sauce |
| Panko Breadcrumbs 🍞 | ½ cup | For crispy topping |
| Parmesan Cheese 🧀 | ¼ cup | Freshly grated, coarse |
| Garlic Powder 🧄 | 1 tsp | For savory depth |
| Onion Powder 🧅 | 1 tsp | Enhances flavor |
| Salt 🧂 | 1 ½ tsp | Kosher or sea salt |
| Black Pepper 🌶️ | ½ tsp | Freshly ground |
| Milk 🥛 | ½ cup | Whole milk preferred |
The cheeses are where the magic happens. Block cheddar and Monterey Jack melt smoother than pre-shredded—worth the extra minute to grate. Trader Joe's has pre-shredded options if you're short on time, but I always grab blocks for that authentic texture. The cream of chicken soup? Homemade or high-quality canned like Campbell's makes all the difference—store brands can taste flat. Pro tip: Toast your garlic powder and onion powder in the butter for 30 seconds before adding milk—it adds a nutty depth you won't get otherwise.
No panko? Regular breadcrumbs toasted with butter work in a pinch, but they won't be as crispy. Short on sharp cheddar? Colby Jack at half the amount gives a milder flavor. The heavy cream is non-negotiable here—half-and-half cuts the richness but works if you're watching calories. For a quick shortcut, use 2 cups of the cream of chicken soup plus 1/2 cup milk instead of measuring separately. And if you're feeling fancy, add 1/4 cup of gruyère for a gourmet twist—it melts beautifully and adds complexity.
This reheats like a dream—just cover with foil and bake at 350°F for 15-20 minutes. Leftovers keep for 4-5 days in the fridge, but honestly, it's best eaten fresh. For make-ahead prep, assemble the dish (without baking) and refrigerate overnight—it tastes even better the next day. Freeze portions for up to 3 months by wrapping tightly in foil and plastic wrap. The crispy top softens when reheated, so always bake it fresh for that perfect crunch!
Why You'll Love This Recipe
- Here’s what sold me: the soup adds a subtle, savory depth that turns basic mac and cheese into something ridiculously good. Sharp cheddar and Monterey Jack melt into a rich, tangy sauce—like comfort food got a gourmet upgrade.
- One-Pan Magic: I swear by this recipe—just toss the cooked pasta, soup, cheeses, and cream into one dish, bake, and walk away. No strainers, no extra bowls, no mess. That crispy top? Pure reward for zero effort.
- Creamy Chicken Twist: Here’s what sold me: the soup adds a subtle, savory depth that turns basic mac and cheese into something ridiculously good. Sharp cheddar and Monterey Jack melt into a rich, tangy sauce—like comfort food got a gourmet upgrade.
- Leftovers That Don’t Suck: Between us, most baked mac and cheese gets rubbery the next day. Not this one. The cream of chicken keeps it creamy, and reheating? Just pop it in the oven for 10 minutes. My kids beg for it cold too—honestly, it’s my secret weapon for lazy mornings.
Step-by-step instructions for creamy baked mac and cheese
Here's how to make the ultimate comfort dish—creamy, cheesy, and topped with golden perfection.
🍳 Step 1: Cook the Pasta Al Dente
Bring a large pot of water to a rolling boil and add 2 cups of elbow macaroni. Cook until just 1 minute shy of package directions for al dente—you want it to finish cooking in the oven. Drain the pasta in a colander and rinse briefly with cold water to stop the cooking process. Shake off any excess water and return the pasta to the pot.
Here's the thing—overcooked pasta gets mushy in the oven. I like to test doneness by tasting a piece—it should have a slight bite. If it's perfectly cooked now, it'll be tender but not mushy after baking.
🍳 Step 2: Build the Cheesy Sauce
In the same pot with the drained pasta, add 2 cups of cream of chicken soup, 0.5 cup of heavy cream, 0.5 cup of milk, 0.5 cup of melted butter, 0.25 cup of all-purpose flour, 2 cups of shredded sharp cheddar cheese, and 1 cup of shredded Monterey Jack cheese. Stir over medium-low heat for 3-4 minutes until the mixture thickens and becomes smooth.
This is where the magic happens—the cream of chicken soup adds that savory depth while the cheeses melt into a velvety texture. If the sauce looks too thick, add 1-2 tablespoons of milk to loosen it. You want it to coat the back of a spoon but still be pourable.
🥘 Step 3: Season and Transfer to Baking Dish
Remove the pot from heat and stir in 1.5 teaspoons of salt, 0.5 teaspoon of black pepper, 1 teaspoon of garlic powder, and 1 teaspoon of onion powder. Pour the mixture into a 9x13-inch baking dish (or similar size) and spread it evenly with a spatula.
Here's my pro tip: Press down gently on the mac and cheese with the back of a spoon to create a smooth surface. This helps the top crust form more evenly. I also like to run a knife around the edges to release any air bubbles—this prevents the crust from puffing up unevenly.
🍳 Step 4: Create the Crispy Topping
In a small bowl, mix together 0.5 cup of panko breadcrumbs and 0.25 cup of freshly grated Parmesan cheese. Sprinkle this mixture evenly over the top of the mac and cheese. The panko gives you that perfect crunch while the Parmesan adds an extra layer of cheesy flavor.
Don't be shy with the topping—this is what creates that irresistible crispy crust. I like to press it down gently with my fingers so it sticks to the cheese underneath. This ensures maximum crispiness when it bakes.
🔥 Step 5: Bake to Golden Perfection
Preheat your oven to 375°F. Bake the mac and cheese for 20-25 minutes until the top is deep golden brown and the edges are bubbling. The center should still be slightly soft—it'll continue cooking as it rests.
Here's where patience pays off: Don't open the oven door during the last 10 minutes of baking. The heat loss will cause the top to steam instead of crisp. When it's done, you'll see that beautiful golden crust with just a hint of brown spots—this is your signal that it's perfect.
Pro Tips For Making Baked Mac And Cheese Recipe With Cream Of Chicken Soup
- Boil Pasta Until Al Dente: I learned this the hard way—overcooked elbow macaroni turns mushy when baked, no matter how much cheese you add. Pull it out when it’s still slightly firm (about 1 minute before package instructions say), then finish cooking in the oven. The residual heat will soften it perfectly while keeping the texture intact.
- Shred Cheese Coarsely: Fine cheese dust burns and clumps when baked, leaving you with a sad, grainy mess. Use a box grater for sharp cheddar and Monterey Jack—big, uneven shreds melt slower and create pockets of gooey goodness. (Yes, even if it looks uneven.)
- Preheat Oven to 375°F: Skipping this step means your mac and cheese bakes unevenly—some parts dry out, others stay soupy. A hot oven (375°F) guarantees a crispy top and creamy center in 20-25 minutes. Preheat while you prep the rest; trust me, it’s worth the wait.
- Mix in Heavy Cream Last: Adding heavy cream too early turns your sauce into a thin, watery glop. Stir it in just before baking—it’ll blend smoothly with the soup and cheese while keeping the sauce rich without diluting it. (This is the thing that actually changes the outcome.)
Essential equipment for perfect results
Baking Dish Essentials
A 9x13-inch baking dish is my go-to for this recipe—it gives the perfect surface area for even baking and crispy edges. I swear by ceramic or glass dishes because they distribute heat more evenly than metal.
If you only have a metal pan, choose one with a thick base to prevent burning. For extra insurance, place your dish on a baking sheet before putting it in the oven—this catches any drips and makes cleanup a breeze. 💛
Pasta Pot Upgrade
Your pasta pot doesn't need to be fancy, but a heavy-bottomed pot with a tight-fitting lid makes all the difference. I love my All-Clad stainless steel pot for even heat distribution, but a good enameled Dutch oven works too.
Just make sure it's large enough to hold the pasta without overcrowding—you want room for the sauce to thicken properly. A pot with measurement markings helps too, so you can monitor water levels without guessing.
Mixing Tools Matter
For stirring the sauce, I recommend a wooden spoon or heat-resistant silicone spatula—both prevent scratching your pot and handle high heat beautifully. When transferring the mac and cheese to the baking dish, a flexible silicone spatula gets into all the corners without leaving residue.
Pro tip: Keep a small whisk handy for smoothing out any lumps in the sauce before baking. A ladle comes in handy for portioning leftovers too.
Crispy Topping Kit
The secret to that perfect golden crust starts with a small mixing bowl for combining your panko and Parmesan. I like to use a glass or ceramic bowl so I can see the mixture clearly.
A pastry brush isn't essential, but it's perfect for lightly brushing melted butter on the top before baking if you want extra crispiness. For pressing down the topping, I use my fingers—it gives the best control for even coverage.
A small offset spatula works too if you prefer not to touch the cheese.
Oven Thermometer Check
Here's where I drop my secret weapon: an oven thermometer. Your oven's temperature display isn't always accurate, and baking mac and cheese requires precise heat control. I use a Thermoworks Oven Thermometer—it's affordable and reliable.
Place it near your baking dish while preheating to ensure your oven is hitting 375°F accurately. This small investment prevents undercooked centers or over-browned tops. Trust me, your mac and cheese will thank you. 🔥
Optional Extras
For the fancy touches, keep a microplane handy for freshly grating Parmesan and a small bowl for melting extra butter if you want to brush the edges for extra browning. A pizza stone isn't necessary but can help create an even crispier crust if you're feeling ambitious.
And if you're making this ahead, grab some plastic wrap and foil for easy storage and reheating. The right tools make all the difference in turning good mac and cheese into restaurant-quality perfection.
Nutrition facts
Frequently asked questions
Can I use cream of mushroom soup instead of chicken?
Swap the cream of chicken soup for an equal amount of cream of mushroom soup for a rich, umami flavor. The earthy notes pair beautifully with cheddar and Monterey Jack. For extra depth, add 1/2 teaspoon of thyme to the seasoning mix. This works especially well if you're serving it with roasted mushrooms on the side.
Why does my baked mac and cheese get watery?
Watery mac and cheese usually means the pasta was overcooked or the sauce wasn't thickened enough. Always cook pasta 1 minute less than package instructions and finish in the oven. For extra insurance, stir in 1 tablespoon of cornstarch mixed with 2 tablespoons cold milk when making the sauce to help it thicken properly.
How do I make this gluten-free?
Use gluten-free elbow macaroni (like Barilla or Jovial) and replace all-purpose flour with 1/4 cup gluten-free flour blend (like Bob's Red Mill 1:1). For the breadcrumb topping, use gluten-free panko or crush gluten-free crackers. Test the sauce consistency carefully—gluten-free flours absorb moisture differently and may need more thickening.
Can I make this ahead of time?
Yes! Assemble the dish (without baking) and refrigerate for up to 24 hours. When ready to bake, add 5-10 extra minutes to the baking time. For freezing, bake first, then cool completely, wrap tightly in foil and plastic wrap, and freeze for up to 3 months. Reheat covered at 350°F for 20-25 minutes—the crispy top will soften slightly.
What's the secret to the crispy top?
The crispy perfection comes from three things: panko breadcrumbs (they toast better than regular crumbs), pressing the topping gently into the cheese, and not opening the oven door during the last 10 minutes of baking. For extra crunch, mix 1 tablespoon melted butter into the breadcrumb topping before sprinkling. Bake on the middle rack for even heat distribution.