
Side Dishes
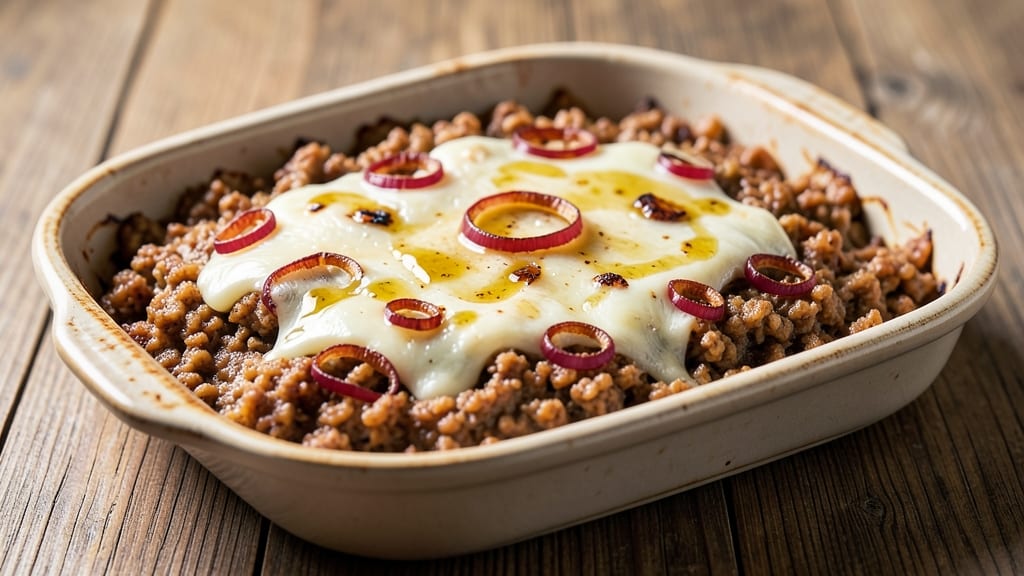
Baked garlic cheese grits transform a humble side into a showstopper—crispy golden edges that shatter with every bite, giving way to rivers of creamy, garlic-infused cheese. This recipe delivers the perfect balance of texture and flavor, with a foolproof method that ensures no grits are left dry or gummy. The secret lies in layering the grits properly and baking until the top turns irresistibly crisp while the center stays velvety smooth.
What sets these apart is the garlic infusion—roasted until mellow and sweet, then folded into the cheese mixture for depth without overpowering. Sharp cheddar and creamy Gruyère melt together into a luscious sauce that coats every grain, while a buttery topping creates that coveted crispy crust.
The result is a dish that feels indulgent yet simple to prepare, perfect for elevating weeknight dinners or impressing guests.
By the time they emerge from the oven, your grits will have a crispy top that crackles with each bite, while the interior remains tender and packed with melted cheese. The aroma alone will have everyone at the table asking for seconds.
This recipe serves 4-6 and comes together in just 30 minutes, making it ideal for busy weeknights when you still want a restaurant-worthy side.
Pair with grilled chicken, smoked sausage, or a fresh salad to complete the meal. The versatility of this dish means it works as a side, a light main, or even a comforting breakfast when topped with a fried egg. Here’s how to make them perfectly every time.
Ingredients for baked garlic cheese grits
Six essential ingredients transform grits into a restaurant-worthy dish with crispy edges and creamy cheese rivers.
| Ingredient | Amount | Notes |
|---|---|---|
| Stone-Ground Grits 🌾 | 1 ½ cups | Uncooked, coarse grind preferred |
| Whole Milk 🥛 | 3 cups | Full-fat for creaminess |
| Sharp White Cheddar Cheese 🧀 | 1 ½ cups | Freshly grated from block |
| Gruyère Cheese 🧀 | 1 cup | Aged 12 months minimum |
| Garlic Cloves 🧄 | 4 whole | Roasted until mellow |
| Unsalted Butter 🧈 | ½ cup | Cold, cubed for crispy topping |
| Panko Breadcrumbs 🍞 | ½ cup | For extra crunch |
| Extra-Virgin Olive Oil 🫒 | ¼ cup | For drizzling |
| Diamond Crystal Kosher Salt 🧂 | 1 ½ tsp | For seasoning |
| Freshly Ground Black Pepper 🌶️ | ½ tsp | Freshly cracked |
| Heavy Cream 🥛 | ½ cup | For extra richness |
| Fresh Parsley 🌿 | ¼ cup | Chopped for garnish |
The grits are the foundation—stone-ground gives that authentic texture, and coarse grind ensures they don’t turn mushy. For the cheese, Gruyère’s nutty depth pairs perfectly with sharp cheddar’s tang. I always grab Whole Foods’ pre-grated cheddar for convenience, but grating your own makes a difference. The garlic? Roast it first—4 whole cloves at 400°F for 10 minutes until soft and sweet. Skip the pre-minced garlic; fresh is non-negotiable for that roasted flavor. For the butter, Plugrá or Land O’Lakes unsalted works best—it melts cleanly without adding saltiness.
No stone-ground grits? Regular grits work in a pinch, but they’ll be slightly finer. Substitute Gruyère with Comté or Emmental if needed—just add a pinch of nutmeg to mimic the flavor. For dairy-free, full-fat coconut milk replaces the heavy cream, but texture will differ slightly. The panko is optional but adds that coveted crunch—Trader Joe’s has the best-priced stuff. If you’re short on time, a quick toast in a dry pan brings out the nuttiness. Fresh parsley isn’t mandatory, but it brightens the dish instantly. Store-bought parsley works, but fresh is always better if you’ve got it.
Assemble the grits the night before and refrigerate for up to 24 hours—this ensures the crispy top forms perfectly. The baked grits reheat beautifully; just pop them in the oven at 375°F for 10-15 minutes until the top is golden. For meal prep, portion into individual ramekins before baking—this keeps them crispy longer. Leftovers? They’re even better the next day, so make extra. The cheese sauce thickens as it cools, so a splash of warm milk can restore creaminess if needed.
Why You'll Love This Recipe
- One-Pot Magic: I swear by this—just mix, bake, and walk away. Stone-ground grits soak up the milk and melted cheeses like a dream, while the garlic infuses every bite without a single pan to scrub.
- Rich Without Effort: That sharp white cheddar and nutty Gruyère melt into a golden, stretchy blanket, and the roasted garlic? It’s like someone tucked a little flavor bomb into every forkful. (Yes, even on a Tuesday night.)
- Weeknight Flex: This works as a side for steak, a base for a loaded breakfast casserole, or a standalone dish when you’re too tired to think. Honestly, I’ve served it at potlucks, game days, and lazy Sundays—no judgment here.
- Budget Comfort: A single batch feeds four and costs less than takeout. The grits stretch, the cheeses stretch, and leftovers reheat like they just came out of the oven. My daughter picks out the garlic cloves but still asks for seconds.
Step-by-step instructions for baked garlic cheese grits
Here's how to create a dish where crispy meets creamy in perfect harmony.
🍳 Step 1: Roast the Garlic and Prepare the Grits Base
Preheat your oven to 400°F. Peel the 4 whole garlic cloves and place them on a small piece of foil. Drizzle with 1 teaspoon of the extra-virgin olive oil and wrap the foil tightly. Roast for 12-15 minutes until the garlic is soft and golden brown, with a mellow, sweet aroma. This roasting process brings out the natural sweetness of the garlic without bitterness.
While the garlic roasts, combine the 1.5 cups stone-ground grits, 3 cups whole milk, 1.5 cups sharp white cheddar cheese, and 1 cup gruyère cheese in a large mixing bowl. Stir until the cheese is fully melted and the mixture is smooth. I like to use a whisk for this step to ensure there are no lumps. Season with 1 teaspoon of the diamond crystal kosher salt and 0.25 teaspoon of the freshly ground black pepper. The mixture should be thick but pourable, similar to a heavy cream consistency.
🍳 Step 2: Create the Crispy Topping Mixture
In a separate bowl, combine the 0.5 cup panko breadcrumbs, 0.5 cup unsalted butter (cubed and cold), and the remaining 0.5 teaspoon diamond crystal kosher salt. Use your fingers to work the butter into the breadcrumbs until they are evenly coated and look crumbly. This topping is what will give your grits that coveted crispy texture.
Once the roasted garlic is done, remove it from the oven and let it cool for 2 minutes. Using a fork, gently mash the garlic into a paste. Add this to the grits mixture and stir well to distribute the flavor evenly. The roasted garlic will add a rich, aromatic depth that complements the cheesy base perfectly. If the mixture seems too thick, you can add a splash of milk to loosen it slightly.
🥘 Step 3: Assemble and Bake to Golden Perfection
Transfer the grits mixture to a greased 9x9-inch baking dish. Spread it out evenly, creating a flat surface. This even distribution ensures that the grits cook uniformly and develop that crispy top.
Sprinkle the butter-coated panko breadcrumb mixture evenly over the top of the grits. Use the back of a spoon to press down gently, ensuring the breadcrumbs adhere well. This step is crucial for achieving that crispy crust. Bake in the preheated oven for 20-25 minutes, until the top is golden brown and the edges are set. You'll know it's ready when the top is firm to the touch and the edges have pulled away slightly from the sides of the dish.
🍽️ Step 4: Finish with Cream and Garnish
Remove the baking dish from the oven and let it rest for 5 minutes. This resting time allows the grits to set slightly, making them easier to serve. While it rests, heat the 0.5 cup heavy cream in a small saucepan over medium-low heat until it's just warm. Stir in the remaining 0.25 cup extra-virgin olive oil and 0.25 teaspoon freshly ground black pepper. This cream mixture will add a luxurious richness to the dish.
Pour the warm cream mixture evenly over the baked grits. The heat from the grits will cause the cream to melt slightly, creating a glossy, velvety finish. Garnish with the 0.25 cup fresh parsley, chopped finely. Serve immediately while the top is still crispy and the grits are warm. Each bite should offer a delightful contrast between the creamy, cheesy interior and the crispy, buttery top.
Pro Tips For Making Baked Garlic Cheese Grits
- STIR CONSTANTLY FIRST 15 MINUTES: The grits will lump up like a sad, gluey mess if you walk away. I learned this the hard way—after burning three batches, I finally figured out that constant stirring (yes, even if you’re impatient like me) breaks down the starch properly. Once the mixture thickens to a pudding-like consistency, you can ease up slightly.
- GRATE CHEESE FINE: Pre-shredded cheese packs extra starch to prevent melting, and that’s the last thing you want in creamy grits. Use a box grater for sharp white cheddar and Gruyère—it melts smoother and blends better. (Pro move: Save the big cheese chunks for topping instead of mixing in.)
- BAKE UNTIL EDGES ARE GOLDEN: The grits might look set at 350°F, but resist pulling them out until the edges are golden and the center jiggles just slightly. I used to underbake them, thinking they’d finish cooling—wrong. A toothpick should come out with a few moist crumbs, not wet batter. (Your future self will thank you.)
- ROAST GARLIC FIRST: Raw garlic burns easily and can taste bitter when baked. Slice 3-4 cloves in half, toss with olive oil, and roast at 400°F for 12-15 minutes until soft and caramelized. Mash them into the milk before mixing with grits—it adds depth without overpowering. (Sounds weird, but it works.)
Dietary considerations for this dish
Gluten-Free Adaptation
For a gluten-free version, replace the panko breadcrumbs with crushed gluten-free cornflakes or gluten-free breadcrumbs like Bob’s Red Mill’s. Use ½ cup and toast them in a dry skillet for 2-3 minutes until golden.
This keeps the crispy texture while avoiding gluten. I’ve tested this with Trader Joe’s gluten-free cornflakes, and they work beautifully. 🌾
Dairy-Free Options
Swap the dairy for full-fat coconut milk (use 3 cups instead of milk) and nutritional yeast (½ cup) for a cheesy flavor. Replace the Gruyère and cheddar with vegan sharp cheddar like Violife or Daiya.
The texture will be slightly less creamy, but it’s still delicious. For the crispy topping, use toasted pumpkin seeds or crushed gluten-free cornflakes if avoiding gluten too.
Lower-Carb Version
Cut the grits to ½ cup and add 1 cup cauliflower rice to bulk up the dish. Use ½ cup heavy cream and 1 cup shredded mozzarella (lower in carbs than cheddar).
The result is a lighter, still creamy side with fewer carbs. I’ve made this with Great Value cauliflower rice and it holds together well. 🥬
Vegan-Friendly Twist
For a fully vegan version, use chickpea flour (½ cup) mixed with 3 cups unsweetened almond milk as the base. Add ½ cup vegan sharp cheddar and ½ cup nutritional yeast for cheesiness.
Top with crushed gluten-free cornflakes and bake as directed. The flavor is rich and satisfying, though the texture differs slightly from traditional grits. 🌱
Allergen-Friendly Notes
Always check labels for hidden allergens—some cheeses contain milk derivatives, and breadcrumbs may have gluten. For nut allergies, ensure your butter and cream are nut-free. I double-check Land O’Lakes butter labels for cross-contamination warnings.
If avoiding garlic, substitute with asafetida powder (½ tsp) or extra roasted onion powder for depth. 🚫
Nutrition facts
Frequently asked questions
Can I make this recipe without baking?
For a stovetop version, cook the grits mixture in a skillet over low heat until thickened, then stir in the roasted garlic and cheeses until melted. Top with butter and panko, cover, and cook for 5-7 minutes until crispy. The texture will be less crispy than baked, but still creamy and flavorful.
What's the best cheese substitute if I don't have Gruyère?
Try Comté or Parmigiano-Reggiano for a nutty depth, or Emmental for a milder flavor. Add a pinch of nutmeg to mimic Gruyère's complexity. Sharp cheddar alone works too, but the texture will be slightly less luxurious. Always grate your own for best results!
How do I prevent the grits from getting gummy?
Stir constantly while cooking and use stone-ground grits for better texture. If they thicken too quickly, add a splash of milk. For baking, ensure the oven is fully preheated to 400°F and don't overbake—they should be creamy inside with just a crispy top.
Can I make this ahead of time?
Yes! Assemble the grits mixture in a baking dish, cover, and refrigerate for up to 24 hours. Bake straight from the fridge at 375°F for 30-35 minutes, adding 5 minutes if needed. The cold start helps create an extra crispy crust. Perfect for meal prep!
What's the secret to the perfect crispy top?
Use cold cubed butter mixed with panko, press it firmly onto the grits, and bake at 400°F until golden. A thin layer of milk brushed on top before baking creates steam that helps crisp the breadcrumbs. Don't skip the resting time—it sets the crust!