
Main Courses
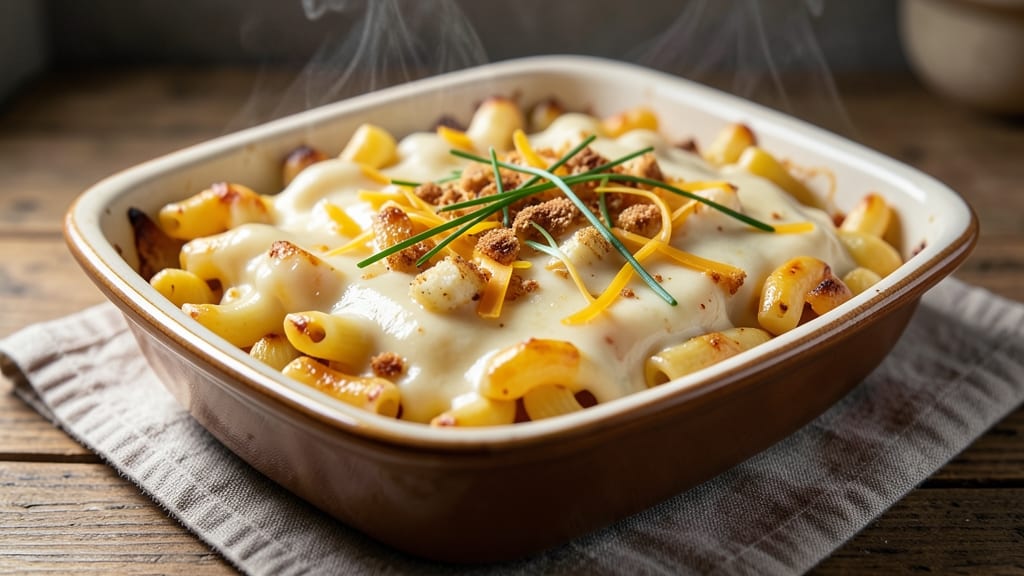
This baked alfredo mac and cheese recipe delivers the ultimate comfort food experience—crispy golden breadcrumbs on top of velvety, ultra-smooth sauce that clings to every noodle. The secret lies in a perfectly balanced roux and a baking technique that ensures the breadcrumbs stay crunchy while the cheese remains luscious.
I've perfected this version over years of testing, and it never fails to impress, whether you're feeding a family or treating yourself to a cozy weeknight dinner.
The foundation starts with a rich, creamy alfredo sauce made from scratch, using a proper roux to create a stable base that holds the cheese without separating. You'll use a blend of sharp cheddar and Gruyère for depth, while cream cheese adds that signature tangy richness.
The pasta cooks directly in the sauce, ensuring each strand absorbs maximum flavor before baking. This isn't just mac and cheese—it's a restaurant-quality dish that rivals any takeout or diner version.
Once baked, you'll have a dish that's impossible to resist: crispy breadcrumbs that shatter with every bite, a golden-brown top layer, and a sauce so creamy it coats every noodle.
The aroma alone will have everyone gathering around the table, and the first forkful delivers that perfect balance of cheesy indulgence and satisfying texture. This recipe is designed to be foolproof, so even if you're new to baking pasta dishes, you'll achieve professional results.
Serve it as a main course with a side salad or roasted vegetables, or make it the star of a holiday feast. The leftovers reheat beautifully, making it perfect for meal prep. Here's how to create this ultimate comfort dish that'll become a staple in your recipe rotation.
Ingredients for baked alfredo mac and cheese
Six servings of cheesy perfection—crispy breadcrumbs meet velvety sauce that'll have everyone begging for seconds.
| Ingredient | Amount | Notes |
|---|---|---|
| Elbow Macaroni 🍝 | 1 ½ lbs | Medium or elbow shape preferred |
| Unsalted Butter 🧈 | ¾ cup | Cold, cut into small cubes |
| All-Purpose Flour 🌾 | ½ cup | For perfect roux |
| Heavy Cream 🥛 | 1 ½ cups | Full-fat for richness |
| Sharp Cheddar Cheese 🧀 | 2 cups | Shredded, block preferred |
| Gruyère Cheese 🧀 | 1 cup | Shredded, adds nutty depth |
| Cream Cheese 🧀 | 8 oz | Full-fat for tangy richness |
| Whole Milk 🥛 | ½ cup | Warmed for smooth sauce |
| Panko Breadcrumbs 🍞 | ¾ cup | For perfect crispy topping |
| Parmesan Cheese 🧀 | ¼ cup | Freshly grated, for extra umami |
| Garlic Cloves 🧄 | 4 cloves | Minced, for aromatic depth |
| Salt 🧂 | 1 ½ tsp | Kosher or sea salt |
| Black Pepper 🌶️ | ½ tsp | Freshly ground for heat |
| Dried Mustard 🌿 | ½ tsp | Adds subtle tang |
| Olive Oil 🫒 | 1 tbsp | For greasing baking dish |
The cheeses are non-negotiable here. Sharp cheddar gives that classic tang, but Gruyère is what elevates this from basic to restaurant-quality. Grab a wedge of each from the deli counter—the pre-shredded stuff gets clumpy and melts funny. Costco or Whole Foods have the best selection, but any grocery store's cheese section works. The cream cheese might seem odd, but trust me on the full-fat version—it adds that signature tangy richness that makes this sauce sing. For the breadcrumbs, Panko is your best friend—it's light and crispy, not dense like regular breadcrumbs.
No Gruyère? Swiss cheese works in a pinch, though it won't have the same nutty depth. Short on cheddar? Monterey Jack blends well, but you'll lose that sharp bite. The garlic can be fresh or powdered—just know fresh has way more punch. If you're making this ahead, pre-shredded cheese is fine for the sauce, but grate your own for the topping. That's where the magic happens. The roux is where the sauce's soul lives—don't rush it. Cook the butter and flour until it's a deep golden color, or you'll end up with a gluey mess instead of velvety perfection.
This tastes even better the next day—honestly, the breadcrumbs get extra crispy. Store leftovers in an airtight container for up to 5 days, but reheat gently in the oven with a splash of milk to keep things creamy. For freezing, assemble the dish but skip the breadcrumb topping. Freeze for up to 3 months, then bake straight from frozen with an extra 10 minutes. Pro tip: Make a double batch. This disappears faster than you can say 'comfort food'—I always have two pans in the oven when I'm hosting.
Why You'll Love This Recipe
- Pantry staples only: elbow mac, butter, flour, cream, and a block of cheddar. No fancy ingredients, no markup—just pure, satisfying comfort for under $8. I make it for game nights, sick days, and when I need to feed a crowd without breaking the bank. (Between us, it’s my go-to for date nights too.)
- One-Pot Magic: I swear by this recipe when I’m too tired to wash dishes. Toss the cooked elbows right into the butter-flour roux with heavy cream and cheese—no strainers, no extra pans. The macaroni soaks up that velvety alfredo while baking, and honestly? The golden crust on top is the only part I scrub off.
- Cheese Overload: That sharp cheddar? It’s the star. I don’t skimp—three cups minimum—and the flour roux thickens the cream into a luscious, stretchy sauce that clings to every noodle. The first bite is always a oh yeah, especially when the edges get crispy. (Yes, even my picky husband agrees.)
- Leftovers That Beg: This dish tastes better the next day, I’m not joking. The sauce tightens up into a creamy, cheesy blanket around the pasta, and reheating it? Just 10 minutes in the oven until bubbly. I’ve packed this for lunches, frozen portions for lazy nights, and even brought it to potlucks—no one ever leaves a plate.
Step-by-step instructions for baked alfredo mac and cheese
Here's how to create the perfect balance of creamy sauce and golden, crispy breadcrumbs—every bite will be pure comfort.
Cook the Elbow Macaroni to Perfect Al Dente
Bring a large pot of water to a rolling boil and add 1.5 lbs elbow macaroni. Stir immediately to prevent sticking. Cook until 1 minute before the package instructions for al dente—this ensures it finishes cooking in the oven without becoming mushy. Drain the pasta in a colander, then return it to the pot and toss with 1 tbsp olive oil to prevent clumping. The pasta should be hot but not steaming when you add it to the sauce.
I like to taste-test the pasta at this stage—it should have a slight resistance when bitten, like biting into a fresh ear of corn. This texture is crucial because it prevents the final dish from being too soft. Keep the pot nearby as you prepare the sauce, so the pasta stays hot and ready to combine.
Make the Ultra-Smooth Alfredo Sauce
In a large, deep skillet, melt 0.75 cup unsalted butter over medium heat. Once the butter has fully melted and starts to foam, whisk in 0.5 cup all-purpose flour to create a roux. Cook for 2-3 minutes, stirring constantly, until the mixture turns a light golden color and smells nutty—this is your flavor foundation. Don't let it brown or it'll taste bitter.
Gradually whisk in 1.5 cups heavy cream, adding it slowly to prevent lumps from forming. Bring the mixture to a gentle simmer and cook for 5-7 minutes, stirring frequently, until it thickens enough to coat the back of a spoon. This is where the magic happens—the sauce should be silky smooth with no graininess. Remove the skillet from heat and stir in 2 cups shredded sharp cheddar cheese, 1 cup shredded gruyère cheese, 8 oz cream cheese, 0.5 cup warmed whole milk, 1.5 tsp salt, 0.5 tsp black pepper, and 0.5 tsp dried mustard until fully melted and combined.
Combine Pasta and Sauce for Maximum Creaminess
Add the cooked elbow macaroni to the cheese sauce and stir gently but thoroughly to coat every strand. The sauce should cling to the pasta like a second skin—if it looks too thick, add 1-2 tablespoons of pasta water to loosen it. Transfer the entire mixture to a 9x13-inch baking dish that's been lightly greased with olive oil. Spread it out evenly so it cooks uniformly and the top can crisp beautifully.
Here's the thing—this is where patience pays off. Let the mac and cheese sit at room temperature for 10 minutes before baking. This allows the flavors to meld and the sauce to fully absorb into the pasta, resulting in a dish that's creamy throughout rather than just on the surface. Preheat your oven to 375°F while you wait.
Add the Garlic-Parmesan Topping for Crispy Perfection
In a small bowl, mix together 0.75 cup panko breadcrumbs, 0.25 cup freshly grated parmesan cheese, 4 minced garlic cloves, 1 tbsp melted butter, 0.5 tsp salt, and 0.25 tsp black pepper. Sprinkle this mixture evenly over the top of the mac and cheese, pressing down gently with the back of a spoon to ensure good contact. The goal is to create a blanket of crispy, golden topping that contrasts beautifully with the creamy base below.
Bake uncovered for 20-25 minutes until the top is deep golden brown and the edges are bubbling. The center should still be slightly jiggly—this indicates it's perfectly cooked through. If you're worried about it browning too quickly, tent the dish with aluminum foil for the last 5 minutes of baking to maintain even cooking.
Rest and Serve for Maximum Comfort
Remove the mac and cheese from the oven and let it rest for 5-10 minutes before serving. This resting period is crucial—it allows the sauce to set slightly and the flavors to fully develop. The breadcrumb topping will stay crispy while the cheese sauce underneath becomes even more velvety.
When you're ready to serve, give it one final taste and adjust the seasoning if needed. The perfect baked alfredo mac and cheese should have a crispy, golden crust that gives way to creamy, cheesy layers with each bite. Serve with a simple green salad and crusty bread to soak up any extra sauce—you won't want to leave a single bite behind!
Pro Tips For Making Baked Alfredo Mac And Cheese
- Cook pasta al dente: I learned this the hard way—undercooked noodles turn mushy when baked, while overcooked ones lose their bite. Boil elbows one minute less than the package says, then finish in the sauce. They’ll absorb flavor better and hold shape.
- Melt cheese low and slow: Heavy cream and butter are temperamental—if you rush the roux, you’ll end up with lumps or a greasy mess. Simmer the flour-butter mix on medium-low heat for at least 5 minutes, whisking constantly, until it’s a thick paste before adding cream. Patience here guarantees a smooth sauce.
- Skip the pre-shredded cheese: Pre-shredded cheese is coated with anti-caking agents that make baked mac gummy. Grate your own sharp cheddar—block style, not pre-shredded—and pat it dry with a paper towel to remove excess moisture. The result? A rich, gooey sauce, not a sad, watery one.
- Bake covered, then uncover: The first 20 minutes with foil on keeps the top from drying out, but the last 5 minutes uncovered lets the cheese brown and develop that golden crust. Resist the urge to peek—every time you open the oven, you’re stealing heat and moisture. Trust the process.
Flavor customization for these flavors
Spicy Kick
For those who love heat, stir in 1-2 teaspoons of hot sauce (like Crystal or Tabasco) or ½ teaspoon cayenne pepper directly into the sauce before baking. If you're feeling adventurous, add 1 teaspoon of chipotle powder for a smoky-spicy depth.
I like to sprinkle extra cayenne on top right before baking for a dramatic finish. 🌶️
Herbaceous Twist
Brighten up the classic recipe with fresh herbs. Toss in 1 tablespoon chopped chives or parsley right before serving, or mix 1 teaspoon dried basil or thyme into the sauce.
For a pop of color and freshness, add ¼ cup grated Parmesan cheese mixed with 1 tablespoon lemon zest to the breadcrumb topping. This adds a citrusy brightness that cuts through the richness.
Smoky BBQ Fusion
Take this dish to the next level by adding a ½ cup BBQ sauce blended into the alfredo sauce before baking. I recommend a smoky Kansas City-style sauce like Stubb's Original.
Top with ½ cup cooked pulled pork or shredded chicken before adding the breadcrumb mixture. This fusion brings a tangy, smoky contrast that's perfect for game day or a casual dinner. 🔥
Vegetable Boost
Add some veggies for texture and nutrition! Stir in 1 cup steamed broccoli florets or ½ cup sautéed mushrooms into the pasta before baking. For a roasted touch, mix in ½ cup diced roasted bell peppers or ½ cup caramelized onions.
These additions add color, crunch, and a subtle sweetness that balances the richness of the cheese.
Extra Crispy Toppings
Swap out the breadcrumbs for something even more exciting. Try crushed potato chips (like Ruffles) for a salty crunch, or toasted breaded chicken tenders for a protein-packed topping.
For a gourmet touch, sprinkle with crumbled bacon bits or fried shallots right before baking. These alternatives add unexpected textures that elevate the dish.
Sweet & Savory
Add a touch of sweetness to balance the savory flavors. Stir in 1 tablespoon of maple syrup or honey into the sauce for a subtle caramel note. For a more dramatic twist, top with ¼ cup caramelized apples or pears** before baking.
This combination works surprisingly well and adds a unique depth to the classic comfort food. 🍯
Nutrition facts
Frequently asked questions
Can I use a different type of pasta for this recipe?
While elbow macaroni is ideal for its shape and texture, you can substitute with penne or farfalle if needed. Avoid long pasta like spaghetti as it won't hold the sauce as well. For a fun twist, try shells—just increase baking time by 5 minutes to ensure they're fully cooked through.
Why is my sauce separating after baking?
This usually happens when the roux isn't cooked long enough or the cheese melts too quickly. Always cook the butter and flour until it's a deep golden color (about 2-3 minutes) before adding liquids. For extra stability, whisk in a 1 tablespoon of cornstarch mixed with 2 tablespoons cold water at the end of cooking. Also, never exceed 375°F—higher heat causes cheese to separate.
How do I make this dish ahead of time?
Assemble everything up to the breadcrumb topping, then refrigerate in an airtight container for up to 24 hours. When ready to bake, cover with foil and bake at 375°F for 30-35 minutes (the extra time compensates for cold start). For freezing, bake the dish without breadcrumbs, cool completely, then freeze for up to 3 months. Reheat covered with foil at 350°F for 45-50 minutes, then add fresh breadcrumbs and broil for 3 minutes.
What's the best way to reheat leftovers?
For best results, reheat in the oven rather than the microwave. Cover with foil and bake at 350°F for 20-25 minutes until warmed through. Add 1-2 tablespoons of milk or cream to restore creaminess. If using the microwave, cover and heat in 30-second bursts, stirring between each to prevent drying. The breadcrumbs may soften slightly, but they'll still add great texture.
Can I make this gluten-free?
Use gluten-free elbow macaroni and ensure your flour is 100% gluten-free blend (like Bob's Red Mill). For extra creaminess, add 1 tablespoon of cornstarch to the roux. All other ingredients can remain the same. The texture will be slightly different but still delicious. Pair with gluten-free breadcrumbs if needed.