
Breakfast & Brunch
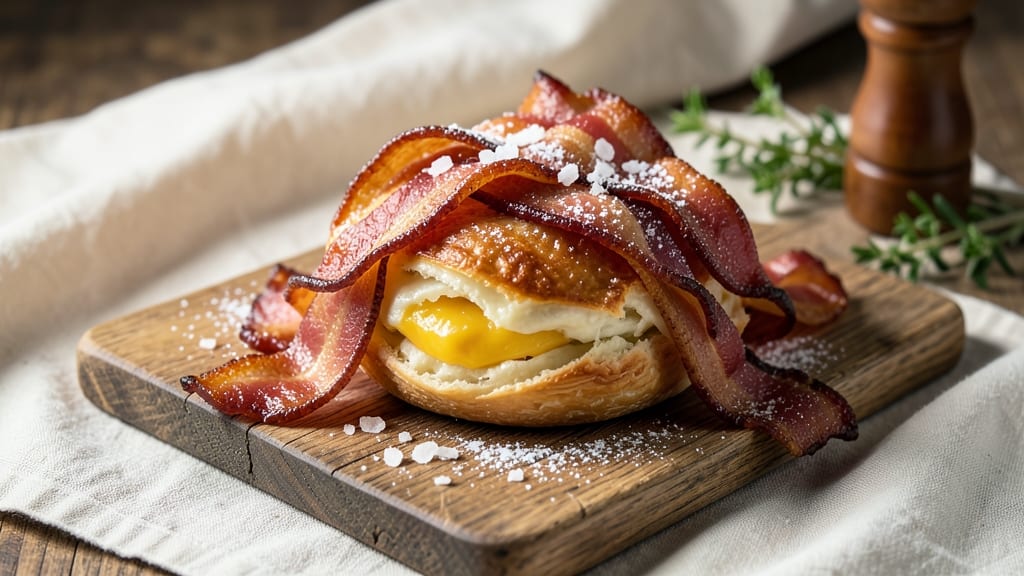
This bacon cheese bomb recipe delivers the ultimate crispy, cheesy, smoky bite that's impossible to resist. 🔥 The secret lies in wrapping sharp cheddar in bacon, then encasing it in a golden biscuit shell that becomes irresistibly crispy—every bite is a perfect balance of textures and flavors.
I've perfected this recipe to ensure the cheese stays molten while the bacon stays perfectly crisp, creating a handheld masterpiece that disappears faster than you can say "breakfast."
The process is straightforward but requires attention to detail: start with high-quality cheddar cubes, wrap them tightly in bacon, then create the biscuit shell using a simple dough. The key to achieving that signature crispy exterior is baking at the right temperature—375°F—while ensuring the cheese inside melts into gooey perfection.
This isn't just a snack; it's a showstopper that transforms any meal into an event. What makes this recipe truly special is how it combines three irresistible elements: the smoky richness of bacon, the sharp tang of aged cheddar, and the buttery, flaky texture of the biscuit shell.
The result is a dish that's equally at home on a weekend brunch table or as a late-night indulgence. Each bite delivers that satisfying crunch followed by the creamy, melty cheese—it's the kind of recipe that turns casual gatherings into memorable moments.
Serve these with a side of honey butter for dipping or a tangy ranch sauce to balance the richness. The best part? You can make a batch ahead of time and reheat them in the oven, ensuring you're always ready for a crowd-pleasing appetizer or snack.
Let's get started on creating these delicious handheld delights!
Ingredients for bacon cheese bomb
Twelve irresistible ingredients for cheesy, smoky, crispy handheld masterpieces that vanish in minutes!
| Ingredient | Amount | Notes |
|---|---|---|
| Thick-Cut Bacon 🥓 | 12 oz | Smoked or hickory flavor preferred |
| Sharp White Cheddar Cheese 🧀 | 1 ½ cups | Cube into 1-inch pieces |
| All-Purpose Flour 🌾 | 3 cups | Plus 1 tbsp for shaping |
| Cold Unsalted Butter 🧈 | ½ cup | Cut into small cubes |
| Milk 🥛 | 1 cup | Whole milk for richness |
| Baking Powder 🍞 | 1 tbsp | Diamond Crystal preferred |
| Salt 🧂 | 1 tsp | Plus extra for dough |
| Black Pepper 🌶️ | ½ tsp | Freshly cracked |
| Garlic Powder 🧄 | ½ tsp | For biscuit flavor |
| Honey Butter 🍯 | ¼ cup | For dipping (optional) |
| Ranch Dressing 🥛 | ½ cup | For serving (optional) |
The bacon and cheddar are non-negotiable stars here. Thick-cut bacon from Oscar Mayer or Costco gives that perfect smoky crunch—thinner slices burn too fast. For the cheese, sharp white cheddar is key (like Cabot or Tillamook), but any aged cheddar works. Cube it 1-inch chunks so it melts dramatically but doesn't ooze everywhere. Pro tip: Buy extra bacon—you'll want seconds. The dough's secret? Cold butter cut into tiny cubes—it creates flaky layers like magic.
No thick-cut bacon? Regular bacon cut into strips works, but it won't be as crispy. Cheese swap? Extra-sharp cheddar or pepper jack for heat. The biscuit dough is flexible—substitute Greek yogurt for milk if you're avoiding dairy (though it won't be quite as flaky). For extra flavor, add 1/4 tsp smoked paprika to the dough. The honey butter and ranch are optional but game-changers—store-bought works, but homemade tastes 100x better. Trust me, the extra 5 minutes is worth it.
Bacon keeps 1 week in the fridge wrapped tightly, but use it fast—it gets chewier. Cheese stays fresh 2 weeks in its original packaging. The biscuit dough can be prepped 24 hours ahead and chilled, but don't roll it out until ready to bake. Assembled bombs freeze beautifully for 1 month—just bake straight from frozen at 375°F for 15-20 minutes extra. Reheat in a 350°F oven for 5-7 minutes to revive that crispy shell without drying out the cheese.
Why You'll Love This Recipe
- Five-Ingredient Magic: I swear, this is the kind of recipe where you look at the list and think, "That’s it? Really?"—and then the first bite makes you question how you ever lived without it. Thick-cut bacon wrapped around sharp cheddar, all held together by a buttery, flaky crust? It’s the kind of comfort that requires zero skill, just a little patience.
- Crispy-Creamy Obsession: Between us, the contrast here is chef’s kiss—crispy bacon edges, gooey melted cheese, and that perfect buttery crack when you bite in. The cold butter in the dough keeps it tender, while the sharp cheddar adds that tangy punch that makes it impossible to stop at one.
- Game Day or Lazy Sunday: Honestly, this is my go-to for anything: tailgating with a cooler full of beer, a quick brunch when I’m too tired to cook, or even a fancy-ish appetizer when company drops by. Freeze half the batch, and you’ve got a snack ready for whenever. (Yes, even on a Tuesday night.)
- Budget-Friendly Feast: Thick-cut bacon and good cheese aren’t cheap, but this recipe stretches them further than you’d think. A single package of bacon makes enough for a crowd, and the dough comes together so fast you won’t waste a single scrap. Leftovers? They disappear faster than I can say "one more."
Step-by-step instructions for bacon cheese bombs
Get ready for the ultimate crispy, cheesy, smoky explosion in every bite!
🔥 Step 1: Cook the Bacon to Crispy Perfection
Line a baking sheet with parchment paper and arrange the 12 oz thick-cut bacon in a single layer. I like to overlap the slices slightly so they render fat more efficiently. Cook in a 400°F oven for 20-25 minutes, flipping once halfway through, until the bacon is deep golden brown and crispy.
Here's the thing—don't rush this step. You want that fat to render completely and the bacon to crisp up properly. When it's done, remove the bacon from the oven and let it cool for 5 minutes on the baking sheet. Then, using tongs, transfer the bacon to a paper towel-lined plate to drain excess fat. Chop the bacon into ½-inch pieces and set aside—you'll use all of it in the filling!
👨🍳 Step 2: Make the Smoky Bacon-Cheese Filling
In a large bowl, combine the 1.5 cups sharp white cheddar cheese (those 1-inch cubes!) with the chopped bacon. Add ½ tsp black pepper and ½ tsp garlic powder to the mix. I like to use my hands for this part—it helps distribute the flavors evenly. The cheese should start to soften slightly from the heat of the bacon.
Now, here's where the magic happens: add the ½ cup cold unsalted butter (cut into small cubes) to the cheese mixture. Use your fingers to work the butter into the cheese until it's fully incorporated and the mixture looks like a thick, crumbly paste. This is your filling—save it for later because we're about to make the biscuit dough!
🍳 Step 3: Mix the Biscuit Dough
In a separate large bowl, whisk together the 3 cups all-purpose flour, 1 tbsp baking powder, 1 tsp salt, ½ tsp black pepper, and ½ tsp garlic powder. This is your dry mix—keep it ready. In another bowl, combine the 1 cup milk and the ½ cup cold unsalted butter (yes, you'll use all of it—this butter is key for flaky layers!).
Pour the wet ingredients into the dry ingredients and stir gently with a fork or wooden spoon until just combined. You want to avoid overmixing—just mix until the dough comes together. The dough will be slightly sticky, but that's perfect. Here's the trick: sprinkle a little extra flour on your work surface and turn out the dough. Gently fold in 1 tbsp additional flour if needed to make it easier to handle.
🥘 Step 4: Assemble and Bake the Bombs
Preheat your oven to 375°F. Divide the dough into 12 equal portions (about 2 tablespoons each) and roll each portion into a 1-inch thick circle on a floured surface. I like to use my hands for shaping—press gently to create a smooth, even circle. The dough should be about 3 inches wide—this gives you plenty of room for the filling!
Place a 1 tablespoon portion of the bacon-cheese filling in the center of each dough circle. Fold the dough over the filling to completely enclose it, pressing the edges gently to seal. Place the assembled bombs on a parchment-lined baking sheet, leaving 1 inch of space between each one. Bake for 18-20 minutes until the tops are golden brown and the biscuits sound hollow when tapped.
🍽️ Step 5: Serve Warm with All the Fixings
Remove the bombs from the oven and let them cool for 2 minutes—just enough time to get them out of the oven but still warm enough to enjoy. Serve immediately with ¼ cup honey butter for dipping (that's your 0.25 cup honey butter divided among all 12 servings) and a side of 0.5 cup ranch dressing for extra flavor. The contrast of the crispy, smoky bacon-cheese bomb with the cool, creamy ranch is pure perfection!
Here's the best part: these bombs stay crispy for about 20 minutes after baking, so make sure everyone has a plate ready. Trust me, they'll disappear faster than you can say "bacon cheese bomb"!
Pro Tips For Making Bacon Cheese Bomb
- CRANK THE HEAT HIGH: I learned this the hard way—starting the bacon in a lukewarm pan is a slow-motion disaster. Get that skillet screaming hot before laying down the thick-cut bacon. You want those first few minutes to be all about rendering fat fast and getting crispy edges before you even think about cheese.
- GRATE THE CHEESE FINE: Sharp white cheddar is the star, but big chunks mean uneven melting and a gooey mess. Pulse it in a food processor or grate it yourself—aim for the consistency of coarse sand. This isn’t the time to be lazy; the cheese should melt into a smooth, stretchy blanket, not clump like a sad fondue.
- DON’T OVERMIX THE DOUGH: The moment you add milk to the flour-butter mix, stop stirring. Yes, it’ll look shaggy at first, but that’s how you get a flaky, crispy crust—not a dense, chewy one. Toss it together just until the dry bits disappear, then fold in the cheese. Overworking it turns your bacon cheese bombs into hockey pucks.
- USE COLD BUTTER, NOT SOFT: Cold unsalted butter in the dough is non-negotiable. If you pull it straight from the fridge and cut it into the flour, you’ll get pockets of steam that create those golden layers. Soft butter? You’re basically making a sad, greasy biscuit. Cut it into tiny cubes and work fast—this isn’t a waiting game.
Creative variations of this dish
Breakfast Brunch Upgrade
Transform these into a showstopping brunch centerpiece by serving them alongside maple-glazed sausages and crispy hash browns. The smoky bacon flavor in the bombs pairs perfectly with the sweetness of maple—trust me, it’s a crowd-pleaser.
For a vegetarian twist, swap the bacon for crispy prosciutto-wrapped mozzarella in the filling. 🍳
Game Day Snack Hack
Double the recipe for Super Bowl parties—these disappear fast! Serve them on a wooden board with spicy mayo and pickled jalapeños for a perfect game-day snack. The handheld format makes them ideal for tailgating too. For extra flair, sprinkle crushed red pepper flakes on top before baking. 🏈
Sweet & Smoky Fusion
Add a caramelized onion to the bacon-cheese filling for a sweet-savory twist. Or try brown sugar and cinnamon in the biscuit dough for a cinnamon roll-inspired version. For dessert, drizzle with warm honey and crushed pecans—it’s like a bacon cheese bomb for breakfast and dessert! 🍯
Air Fryer Shortcut
Skip the oven and use an air fryer for individual portions! Assemble the bombs as directed, then air fry at 375°F for 8-10 minutes, flipping halfway.
This method keeps the cheese gooey while giving the biscuit shell a crispy texture without overcrowding. Perfect for weeknight snacks or last-minute appetizers. ⚡
Global Twist: Korean-Inspired
Swap the cheddar for gooey mozzarella and add gochujang (Korean chili paste) to the filling. Top with sesame seeds and green onions for a spicy, umami-packed fusion. Serve with soy-glazed edamame for a full Korean-inspired brunch. 🌶️
Freezer-Friendly Make-Ahead
Assemble the bombs, freeze them on a tray for 1 hour, then transfer to a ziplock bag for up to 1 month. Bake straight from frozen at 375°F for 25-30 minutes—no thawing needed!
This is my go-to party prep—just pull them out and bake when guests arrive. 🧊
Nutrition facts
Frequently asked questions
Can I make these without a biscuit dough?
Swap the biscuit shell for puff pastry or phyllo dough for a flaky alternative. For a quick version, use pre-made biscuit rounds (like Pillsbury) and wrap the bacon-cheese filling inside—just bake at 375°F for 12-15 minutes until golden. The texture will differ but still deliver that gooey cheese and smoky bacon combo!
Why is my cheese oozing out instead of melting?
Overbaking causes cheese to leak! The biscuit shell should be golden brown but still slightly soft—tap it gently, and it should sound hollow. If the cheese is leaking, pull them out 1-2 minutes early and let them rest 3 minutes before serving. For extra insurance, use shredded cheese instead of cubes—it compacts better and melts more predictably.
How do I make these ahead of time?
Assemble the bombs, then freeze them on a tray for 1 hour before transferring to a ziplock bag. Store for up to 1 month—bake straight from frozen at 375°F for 25-30 minutes. For make-ahead prep, you can also bake them 1 day ahead, cool completely, and reheat at 350°F for 5-7 minutes to revive the crispiness.
What’s the best cheese for this recipe?
Sharp white cheddar is ideal for its tangy punch, but Monterey Jack or pepper jack work too. Avoid mild cheddar—it won’t melt as dramatically. For a creamy texture, try brie or gouda (they soften beautifully). Pro tip: Pre-shredded cheese has anti-caking agents that can prevent proper melting, so cube your own!
Can I use turkey bacon instead?
Yes, but expect a lighter, less smoky flavor. Turkey bacon works best if you add ½ tsp smoked paprika to the dough or filling to boost depth. For extra richness, brush the assembled bombs with a little bacon fat before baking. Lean turkey bacon may also require 1 extra minute of baking time to crisp properly.